Configuring users
Change a registered user's details, default cost account, role and sign-in settings in the PriApps CloudPrint Console.
Each registered user has settings on three tabs: General, Accounting and Advanced. Many are filled in automatically from Microsoft Entra ID. You can change settings for one user, or for several users at once.
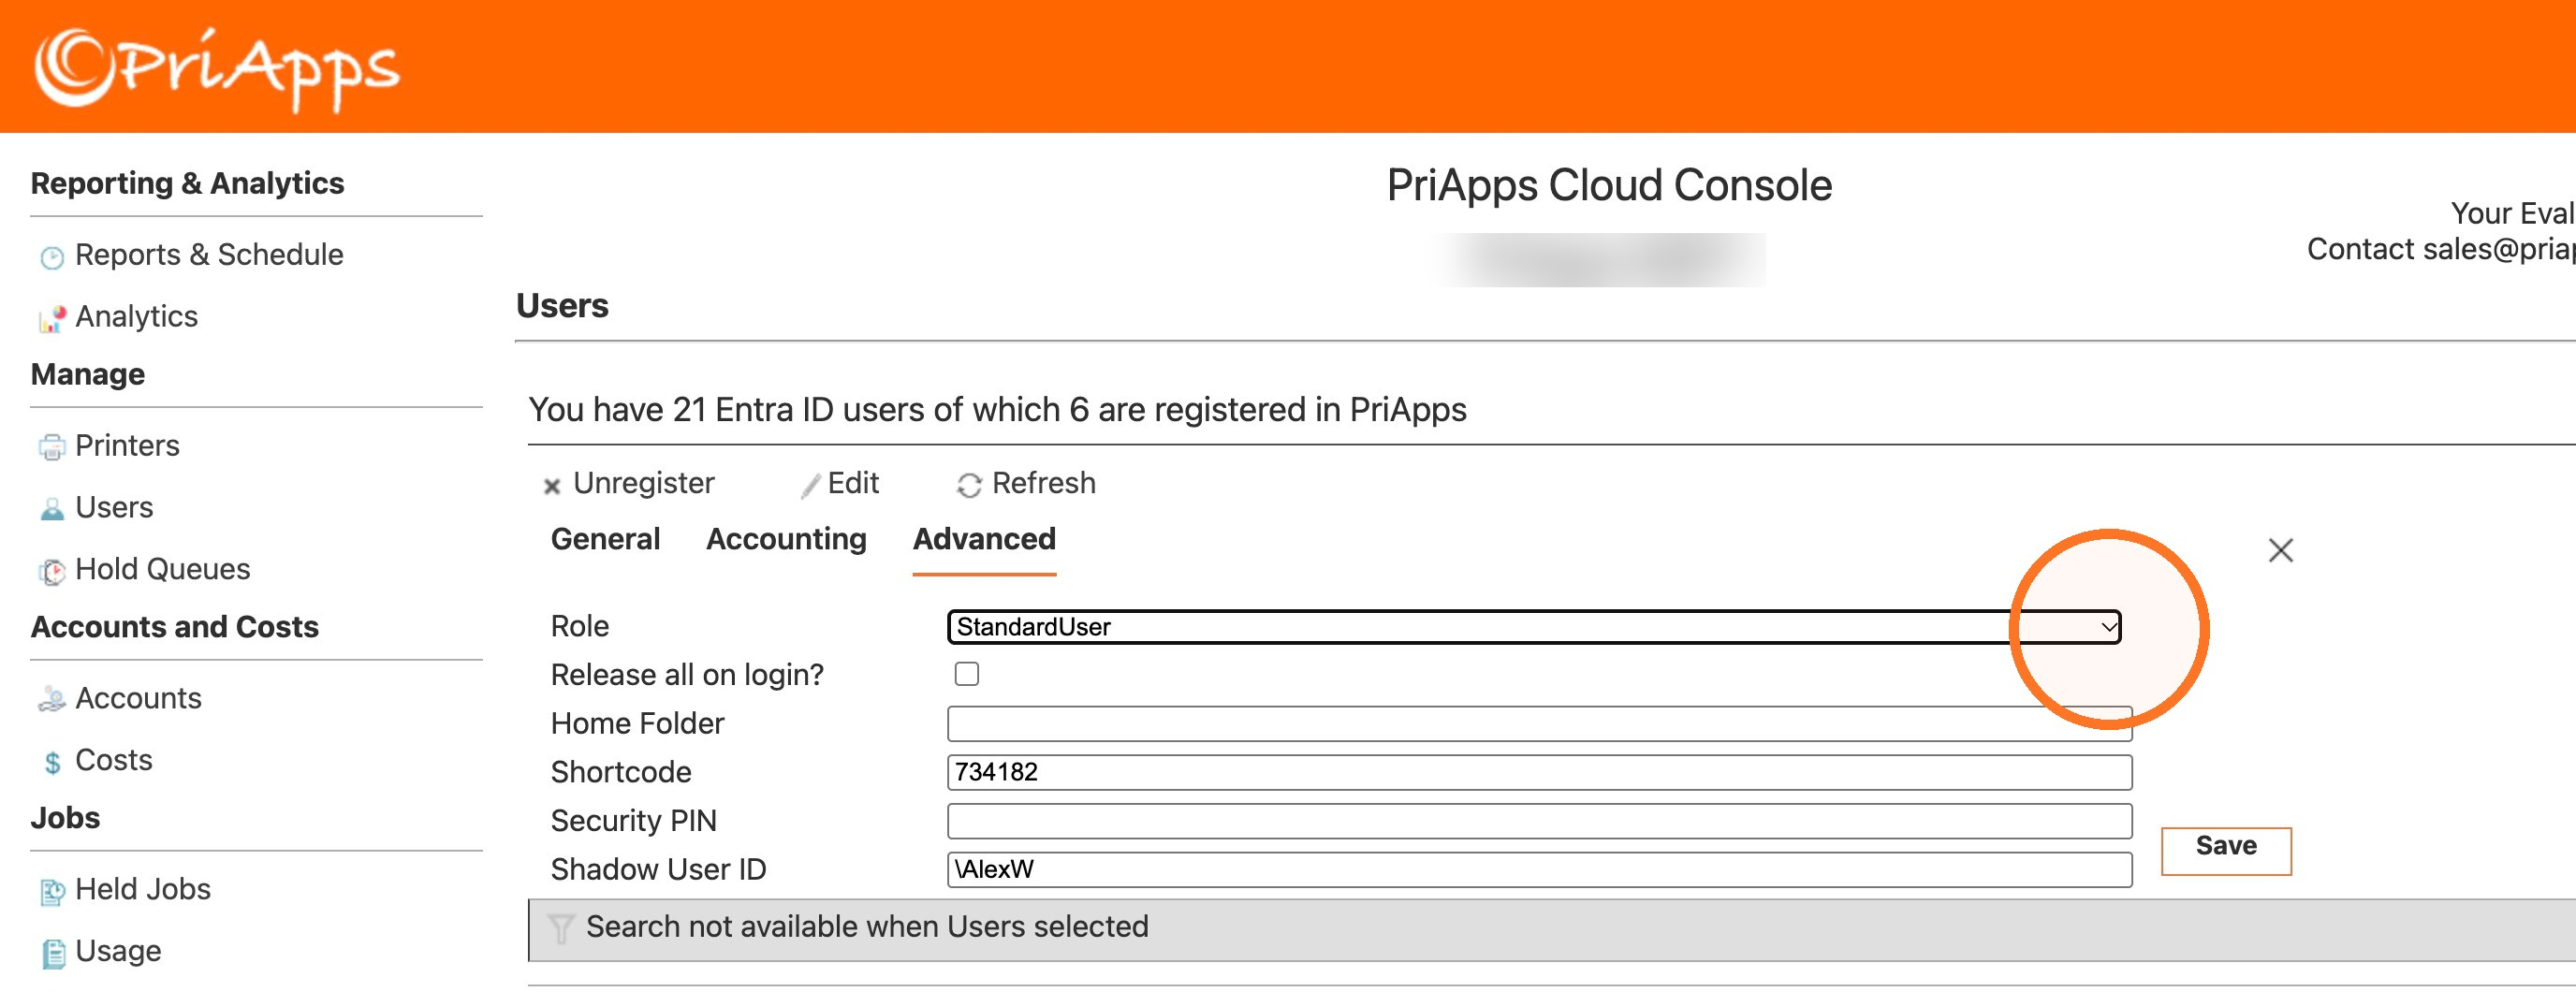
The most important setting is the user's role, which sets what they can do at the MFPs and printers they sign in to. See Roles.
Before you begin
- Sign in to the PriApps CloudPrint Console. See Signing in to the PriApps CloudPrint Console.
- The users must be registered. See Registering users.
Open a user's settings
Open Users
In the menu, under Manage, select Users.
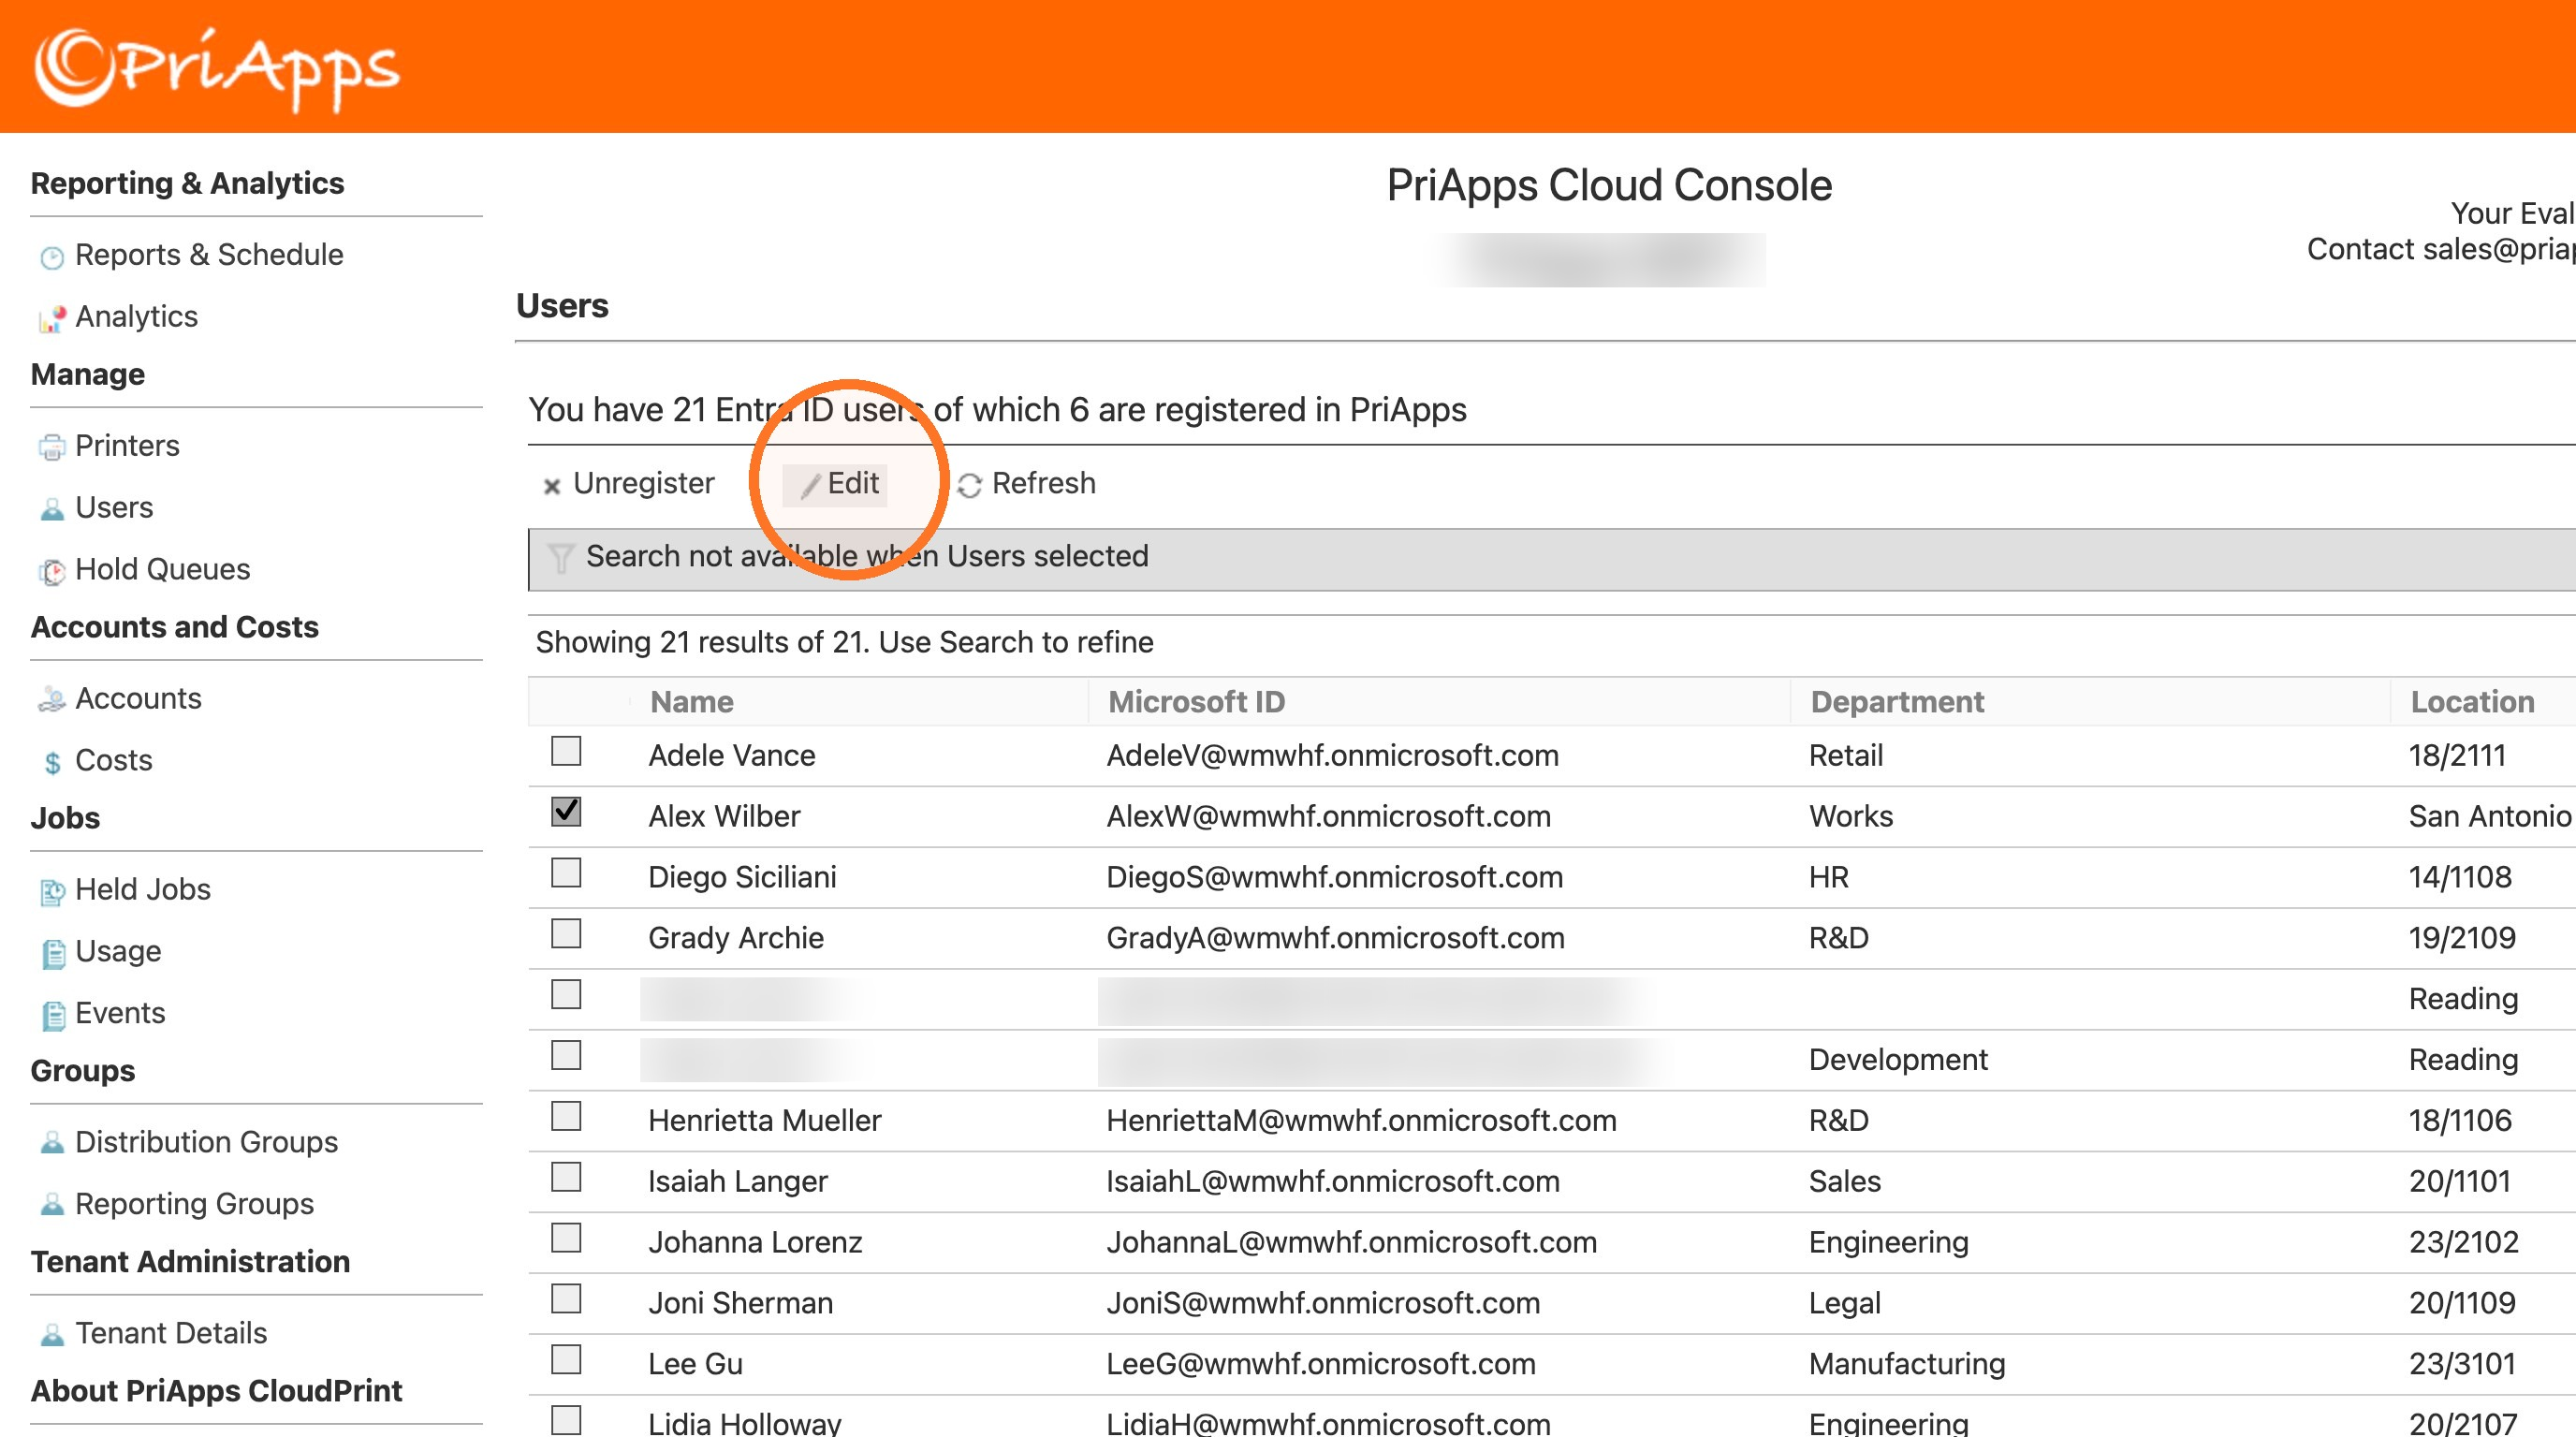
Select the user
Select the check box next to the user. To change a setting for several users at once, select each of them.
Select Edit
Above the list, select Edit (Edit All when several users are selected). The user's settings open above the list, on the General tab.
General
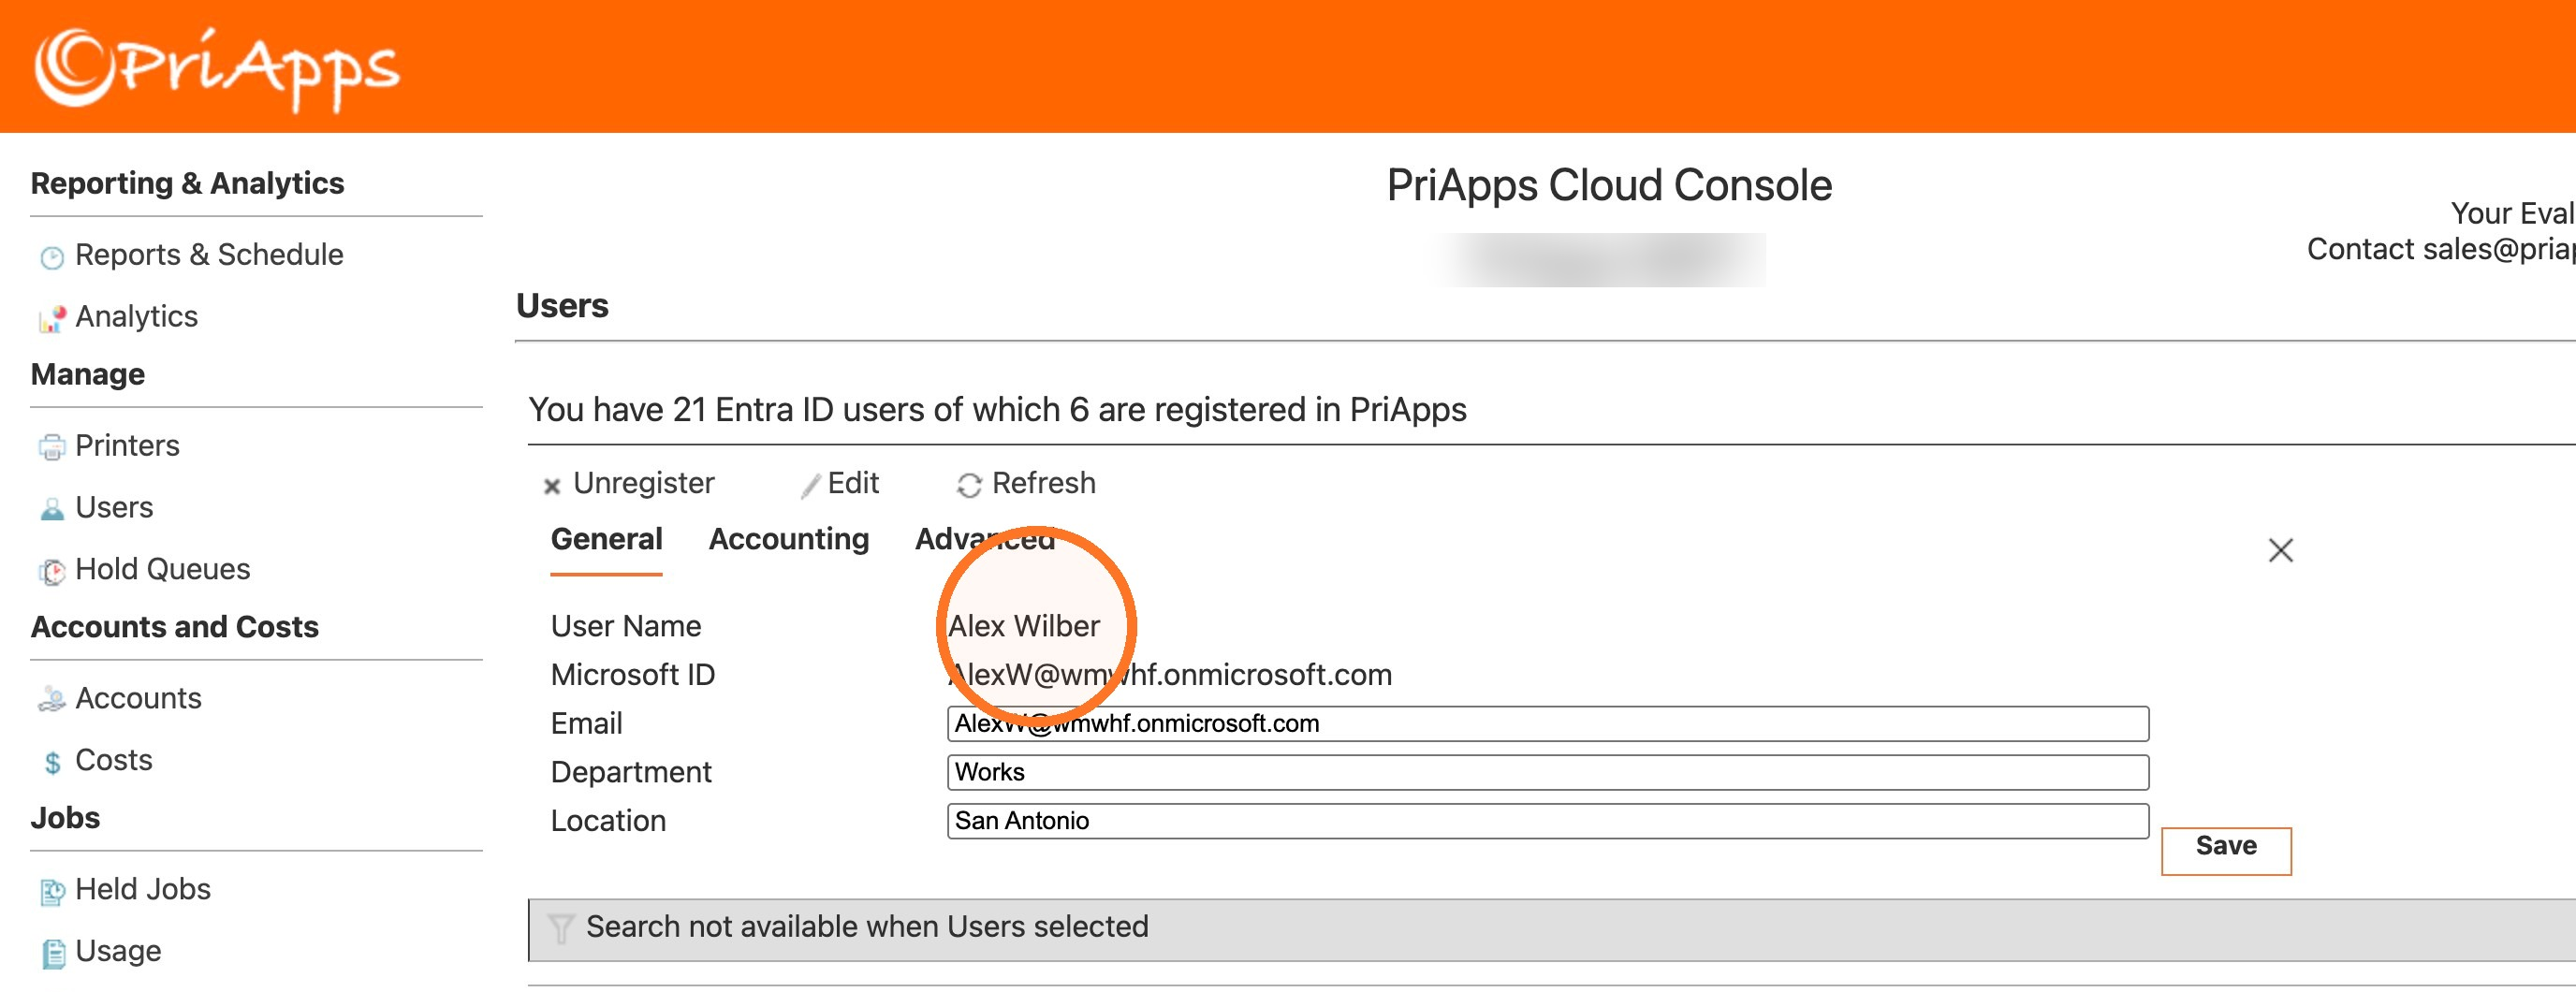
The General tab holds the user's details.
| Setting | What it is |
|---|---|
| User Name | Filled in automatically from Microsoft Entra ID. |
| Microsoft ID | Filled in automatically from Microsoft Entra ID. |
| Filled in automatically from Microsoft Entra ID. | |
| Department | Filled in automatically from Microsoft Entra ID. |
| Location | Filled in automatically from Microsoft Entra ID, or you can enter it. |
Accounting
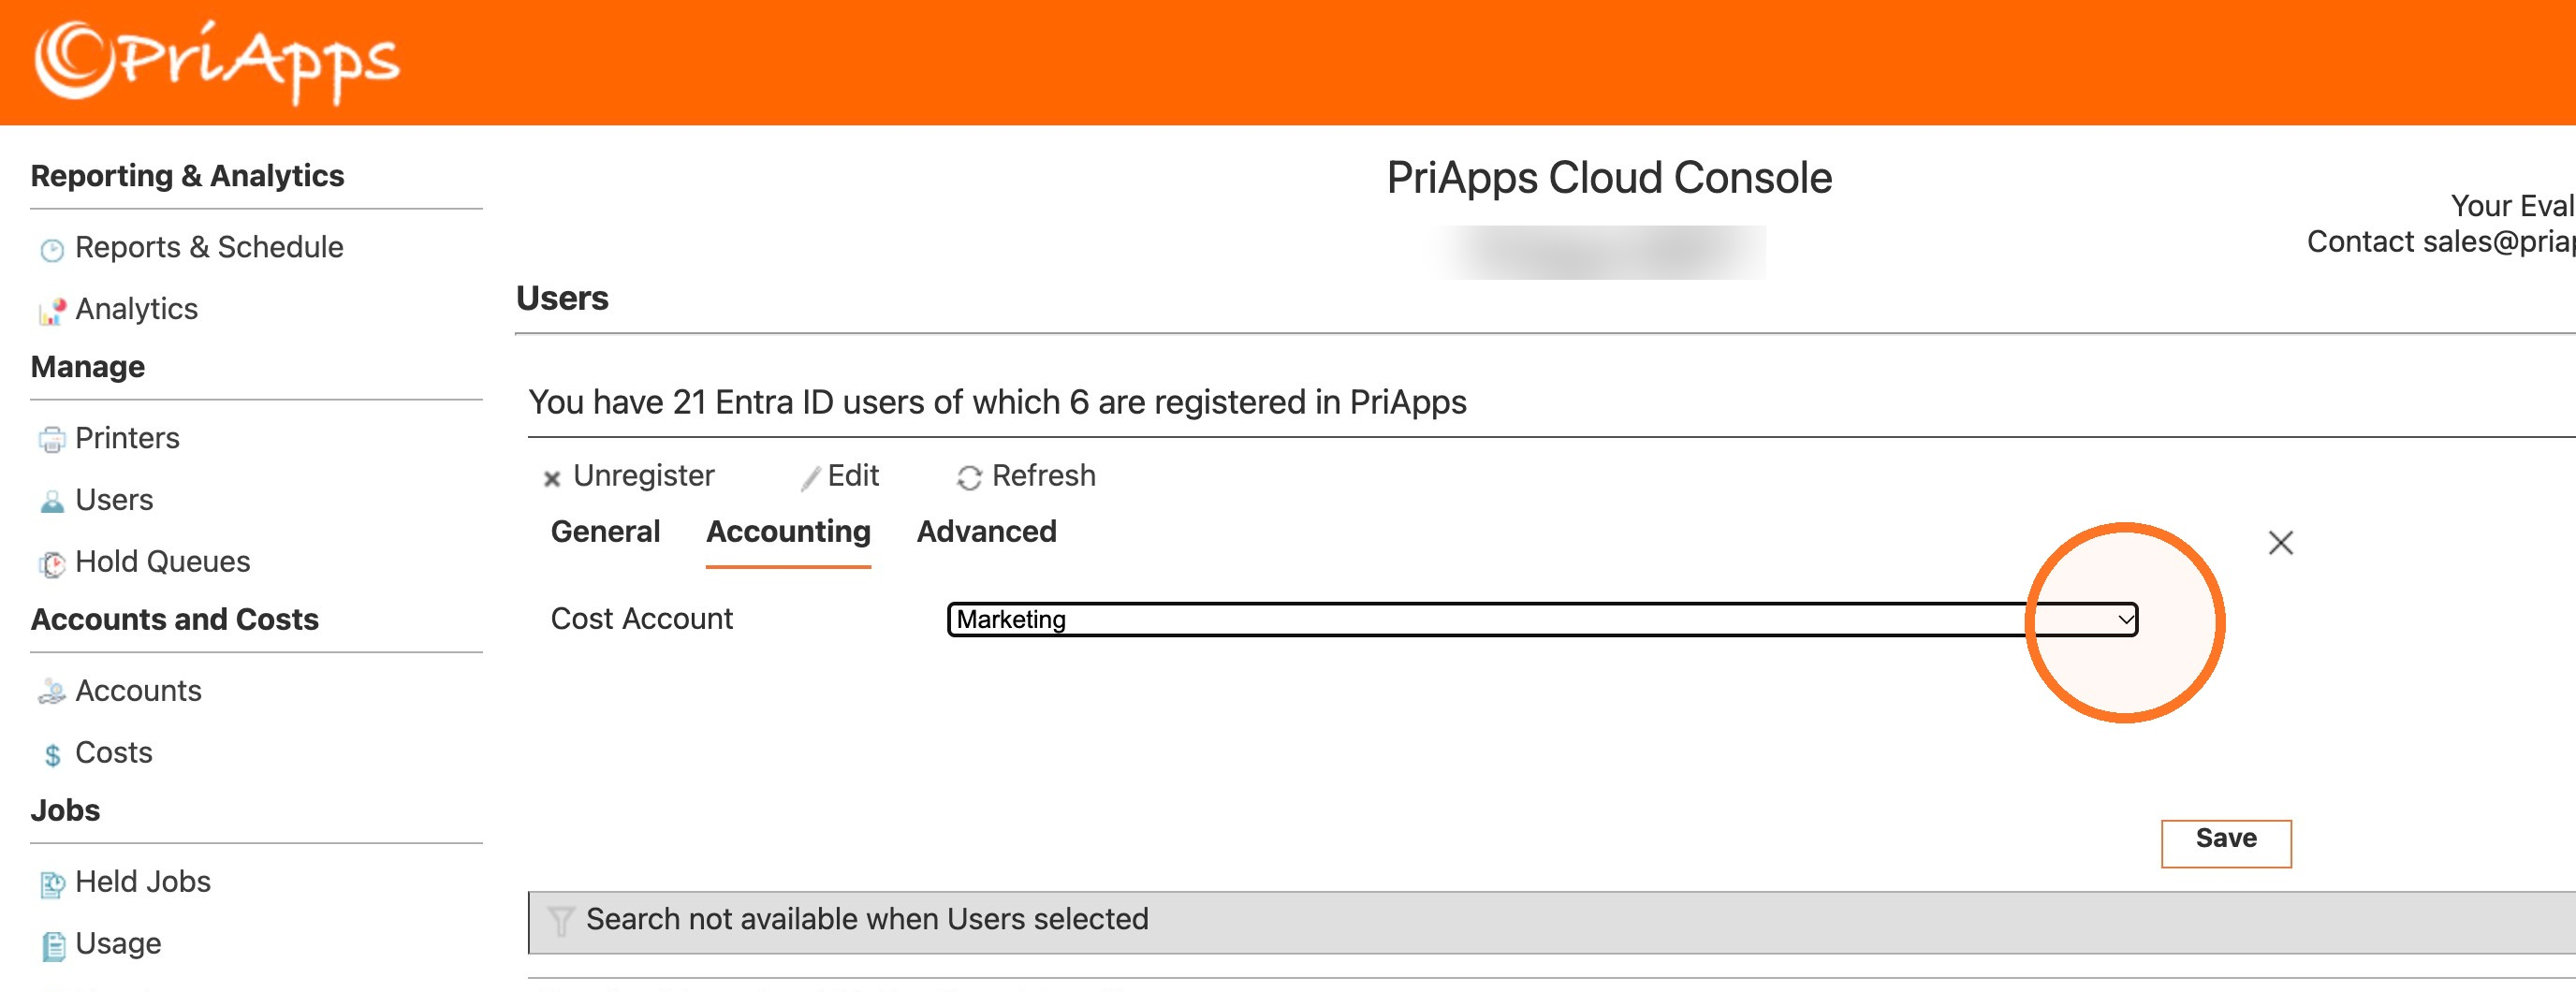
On the Accounting tab, choose the user's Cost Account from the list. The cost account is the user's default account or cost center in your organization, used for cost recovery and reporting.
Advanced
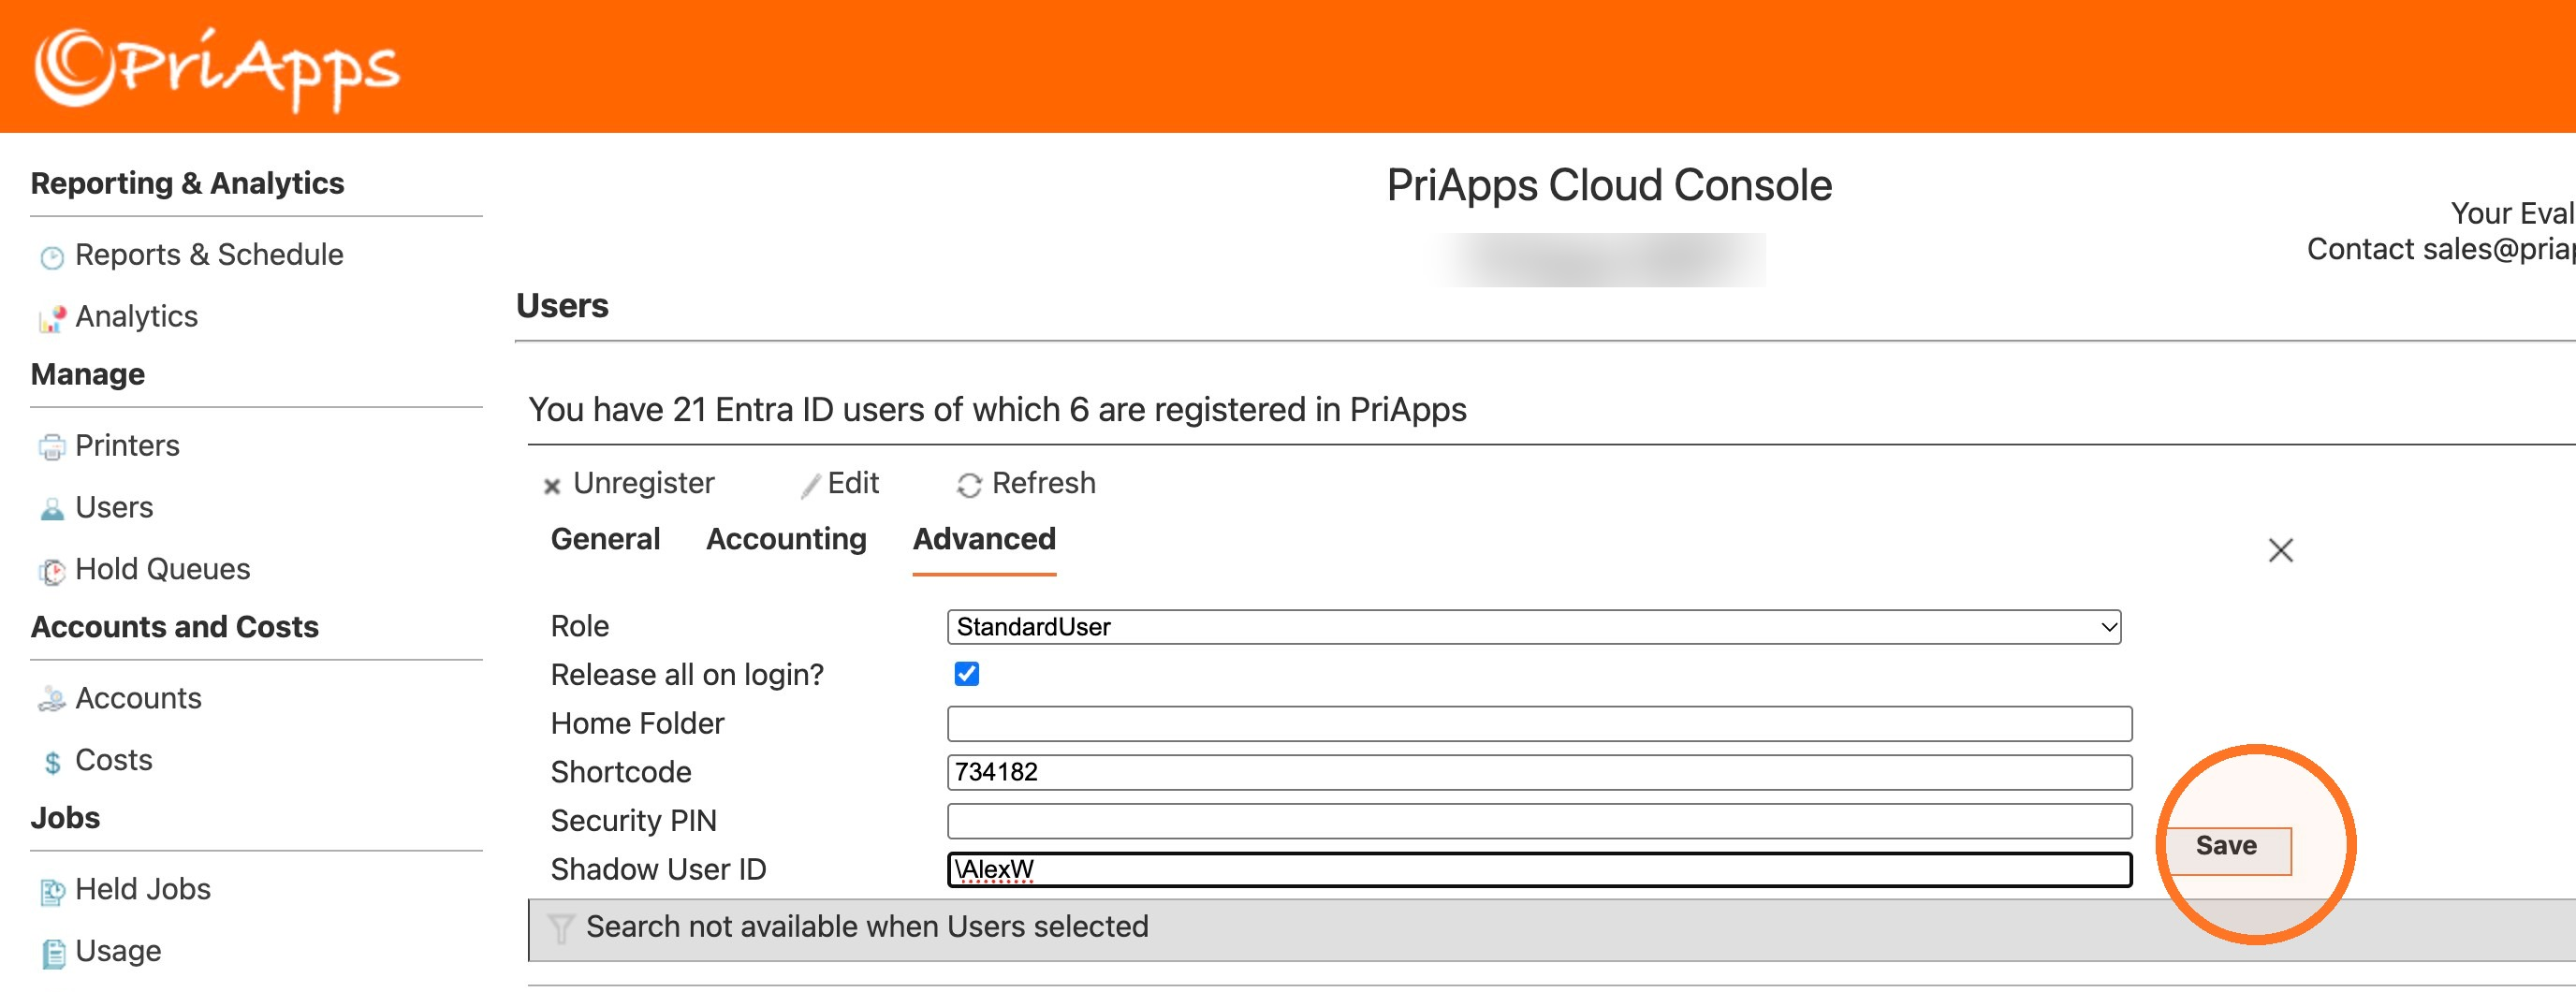
The Advanced tab sets the user's role, how their print jobs are released and how they can sign in at the device.
| Setting | What it does |
|---|---|
| Role | The user's role, which sets what they can do at the device. Choose one from the list. See Roles. |
| Release all on login? | Select it to release all the print jobs in the user's myQueue automatically when they sign in at an MFP or printer. |
| Home Folder | Filled in automatically from Microsoft Entra ID, or you can enter it. It's the destination for scan-to-home-folder workflows. |
| Shortcode | Filled in automatically from Microsoft Entra ID, or you can enter it. It can be used to sign in on the MFP's touchscreen. |
| Security PIN | Filled in automatically from Microsoft Entra ID, or you can enter it. It can be used to sign in on the MFP's touchscreen. |
| Shadow User ID | The ID the Windows print spooler uses for the user when it sends their print jobs. Windows identifies Microsoft Entra ID users with an older style of ID, not the username@domain form, so PriApps CloudPrint generates this ID automatically to recognize the user's print jobs. You can also enter it. |
Roles
A user's role sets the permissions they have at the MFP or printer they sign in to. You choose it in the Role list on the Advanced tab. PriApps CloudPrint includes these roles:
| Role | What it means |
|---|---|
| StandardUser | The user can use all print, copy, scan and fax functions on the device. |
| Locked | The user's account is locked. |
| Device Administrator | The user can perform device administration functions on a managed MFP or printer. |
| NoColor | The user can't print or copy in color. |
| NoFax | The user can't fax. |
| NoFaxCopy | The user can't fax or copy. |
| NoPrint | The user can't print. |
| NoCopy | The user can't copy. |
| NoEmail | The user can't scan to email. |
| ScanOnly | The user can only scan. |
If you need a role that isn't listed, contact PriApps Support at support@priapps.com.
Save your changes
Select Save. The changes on all three tabs are saved together.