
Adding MFPs, copiers and printers
Add an MFP, copier or printer to PriApps CloudPrint, and choose how its usage is charged and how users sign in at it.
You add each MFP, copier or printer that PriApps CloudPrint manages in the PriApps CloudPrint Console. Its settings are on four tabs: General, Details, Embedded and Options. Together they decide how the device's usage is charged, what users see on its touchscreen, and how they sign in.
Before you begin
- Sign in to the PriApps CloudPrint Console. See Signing in to the PriApps CloudPrint Console.
- Set up the billing accounts and price models you want to use. They're under Accounts and Costs in the menu.
- Have the device's manufacturer, model and embedded platform to hand.
Steps
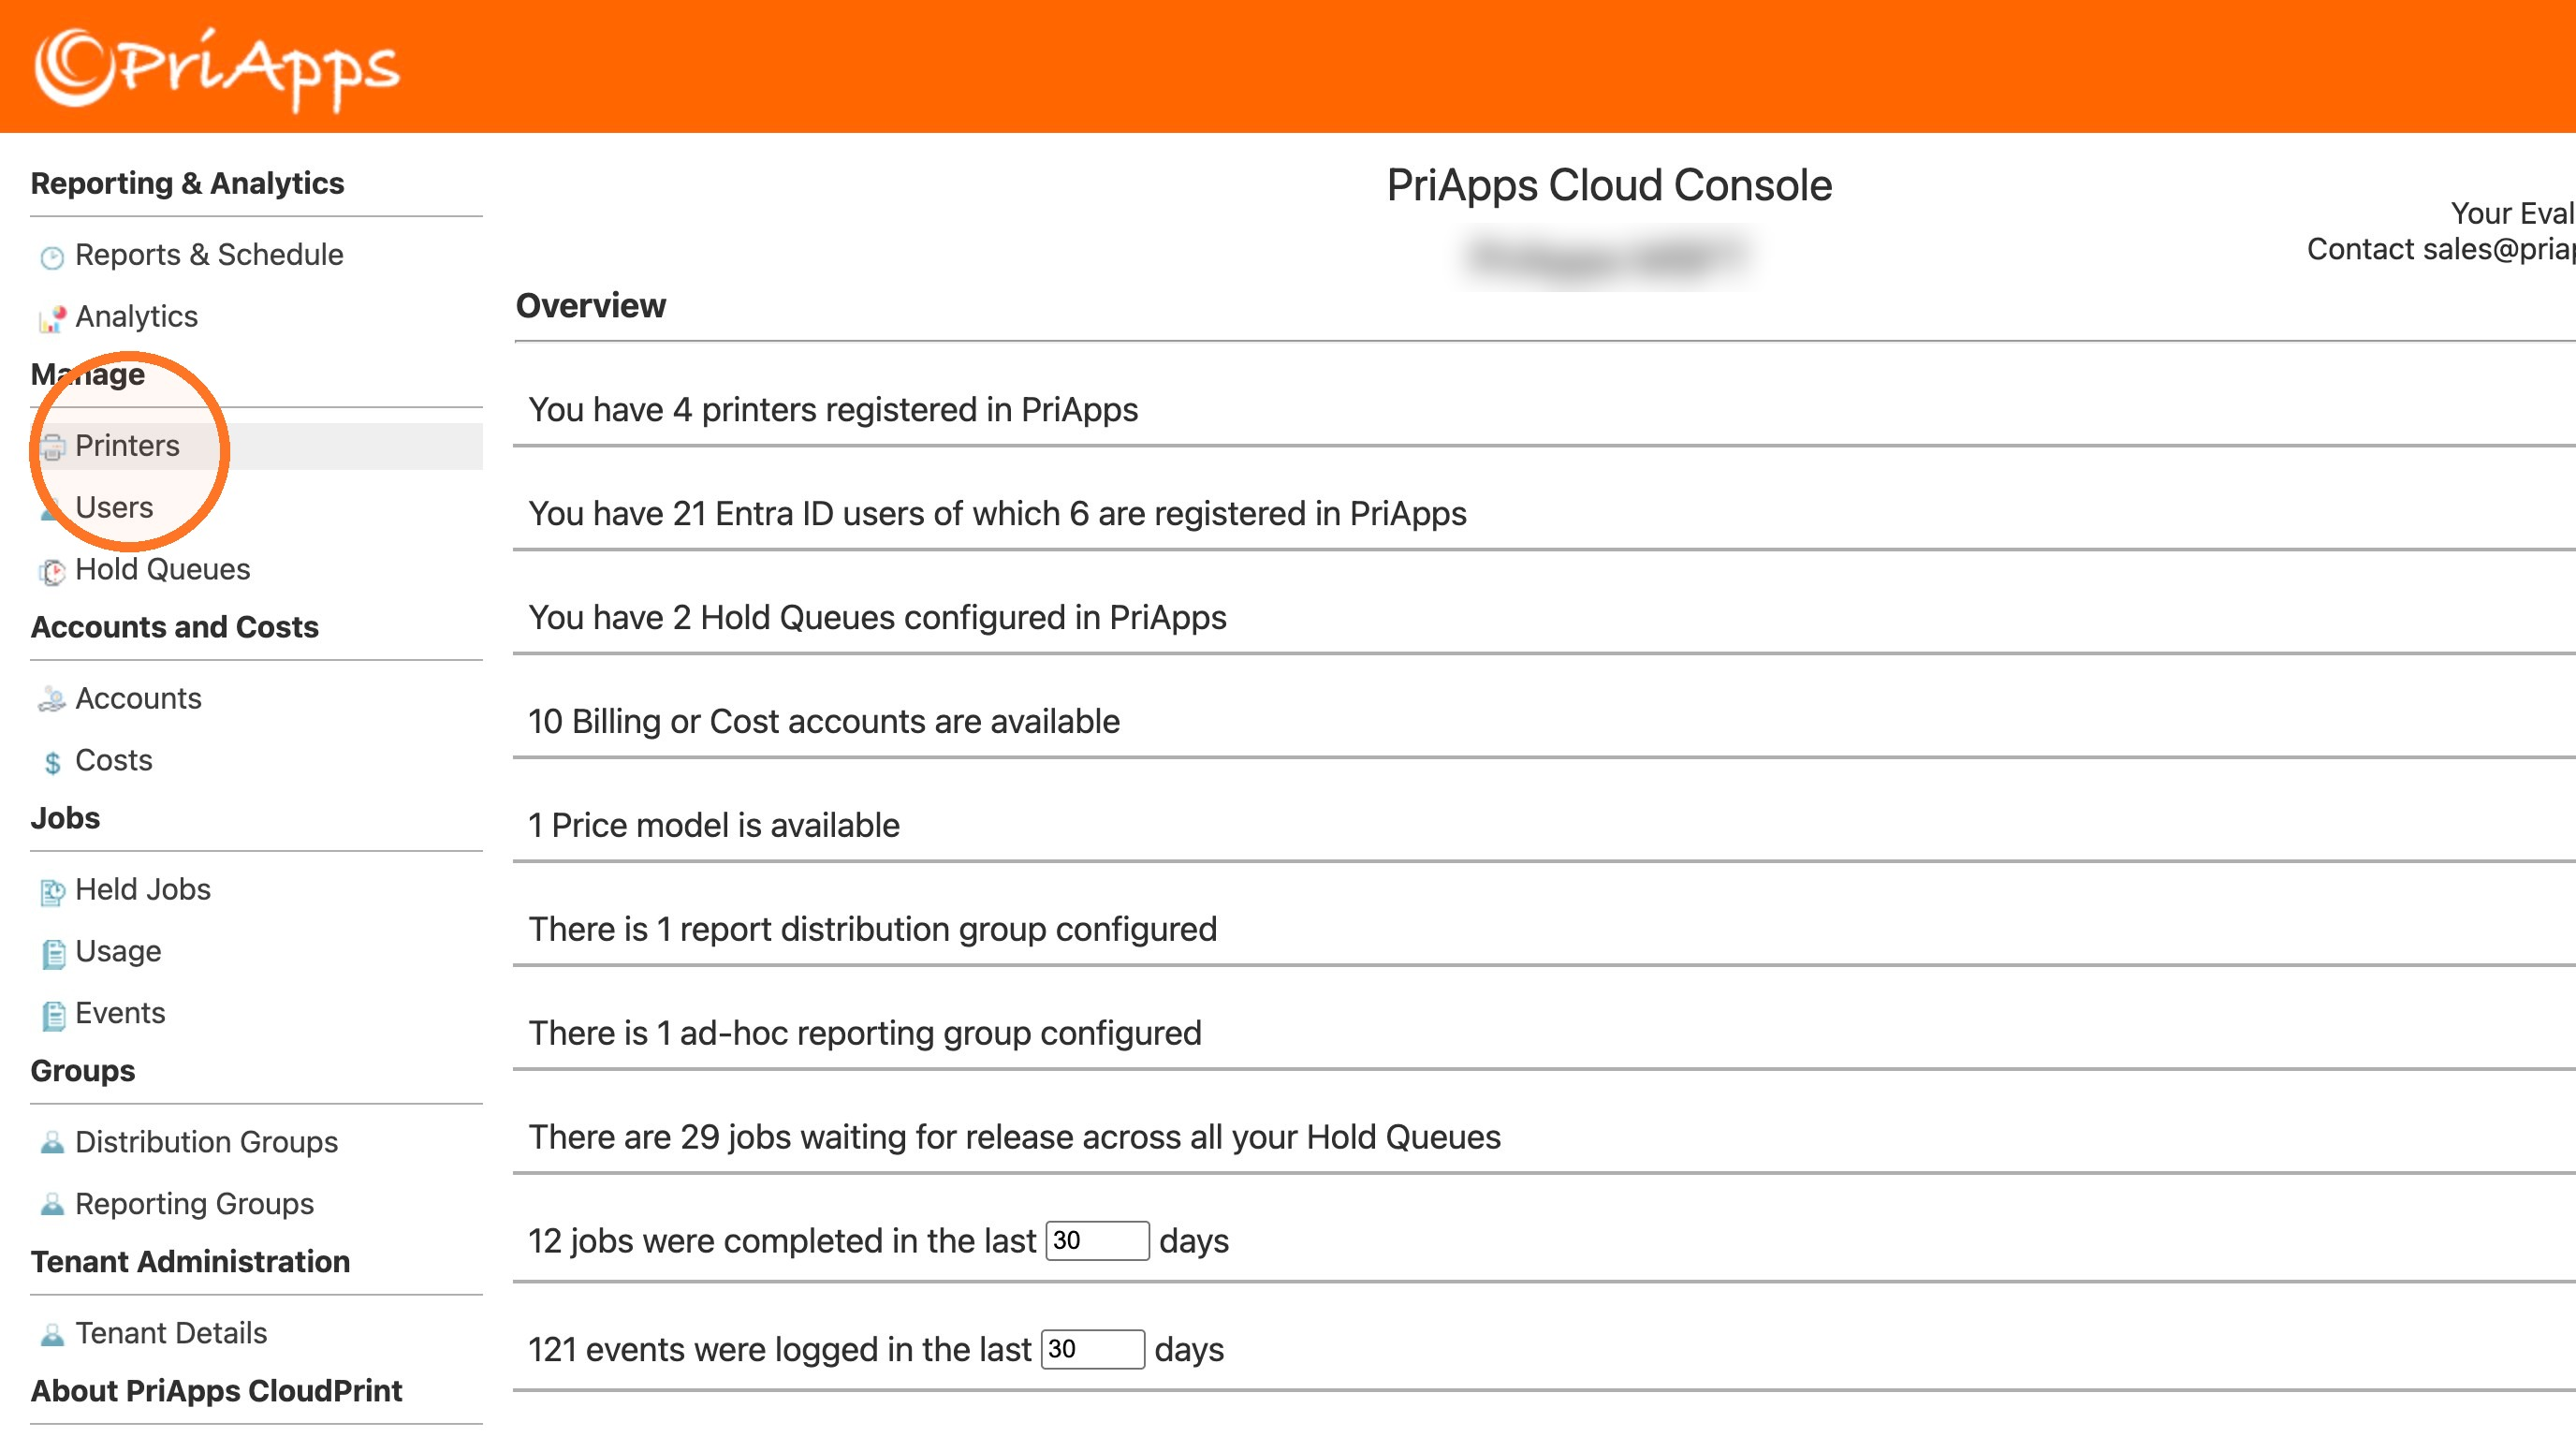
Open Printers
In the menu, under Manage, select Printers.
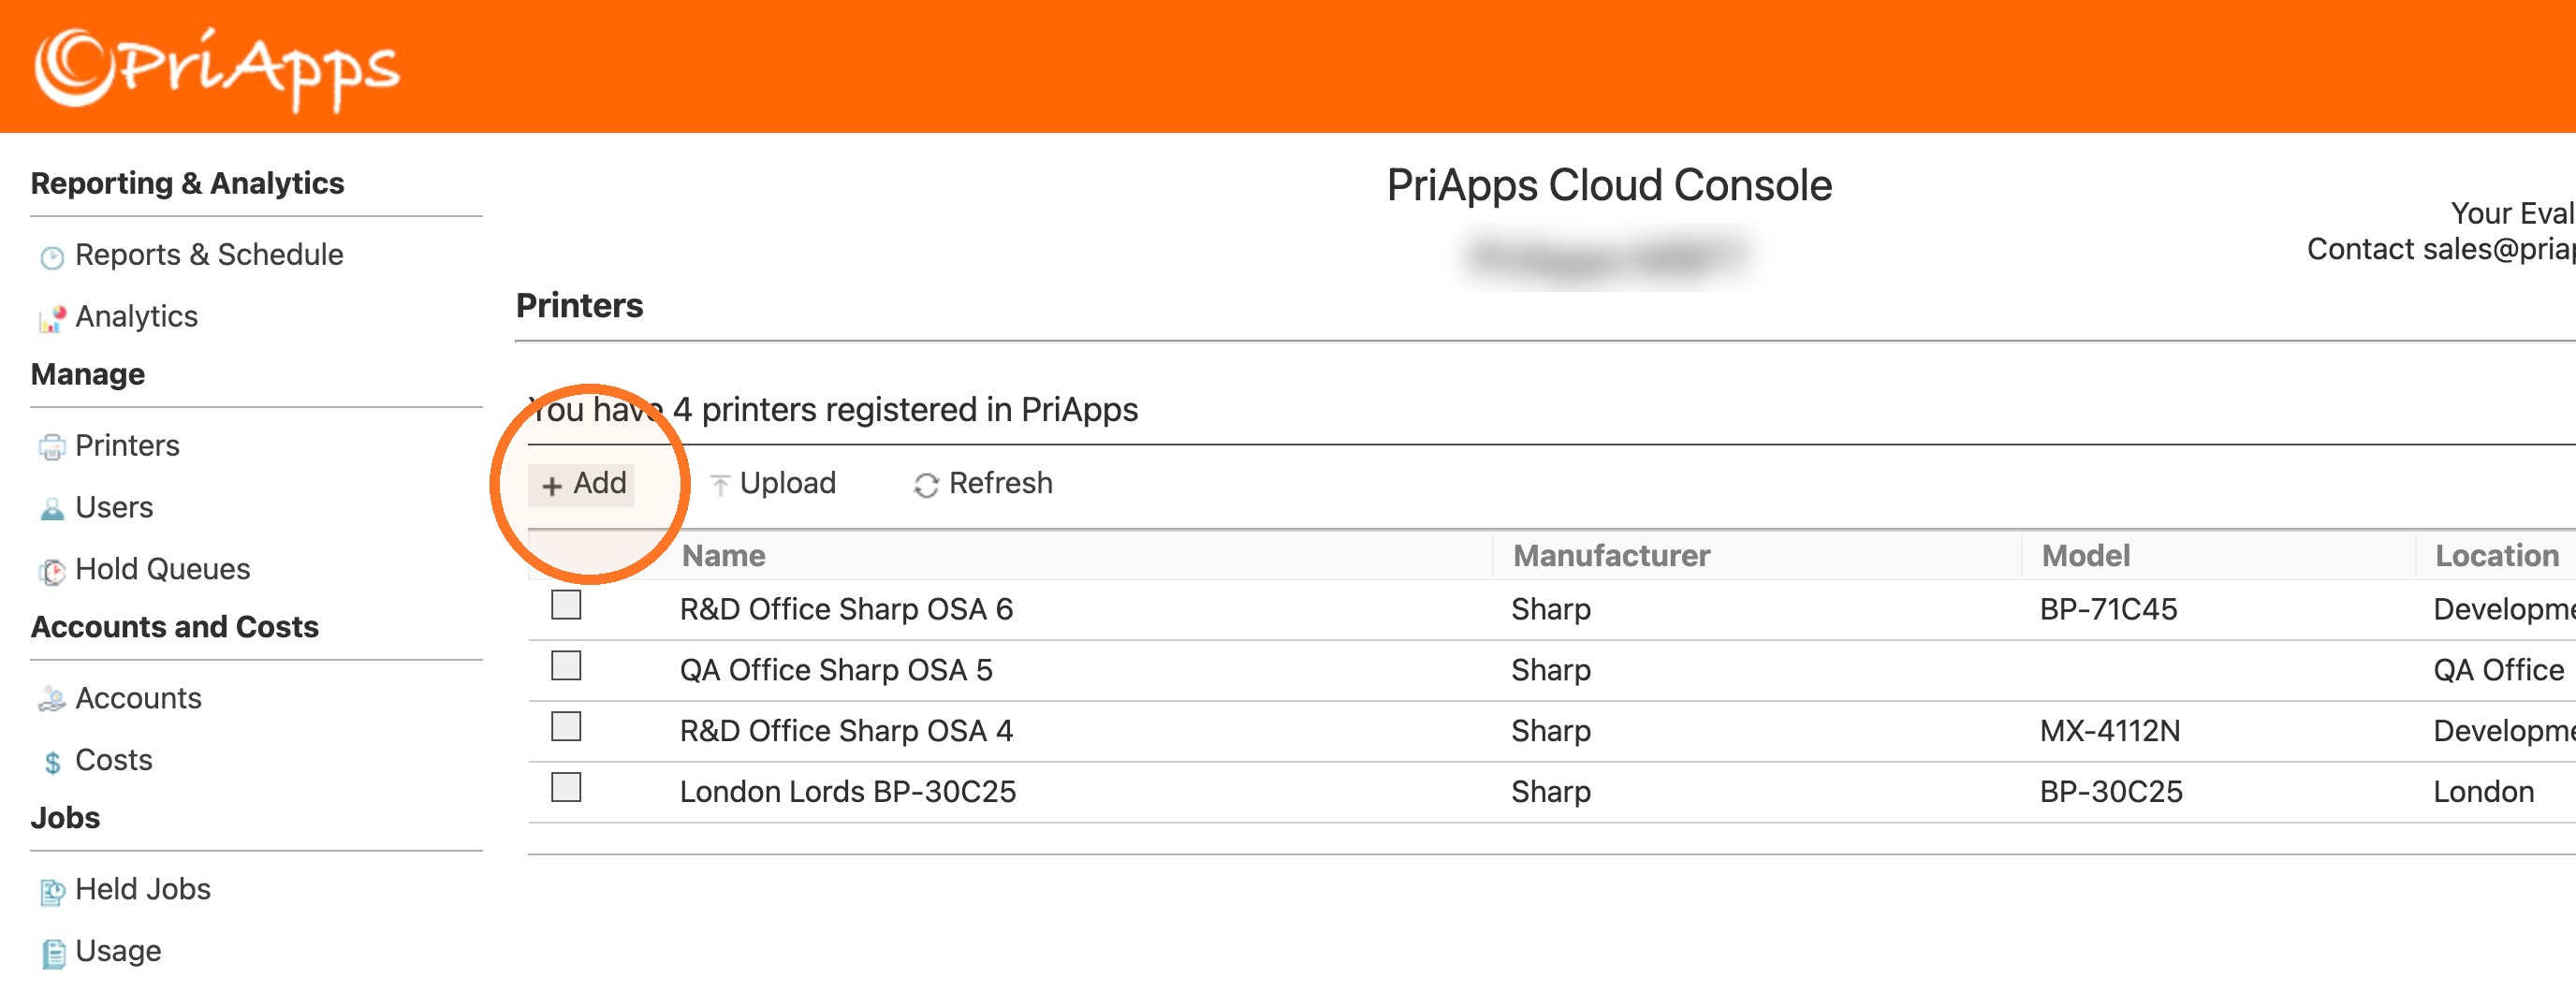
Select Add
Above the list of printers, select Add. The settings open above the list, on four tabs.
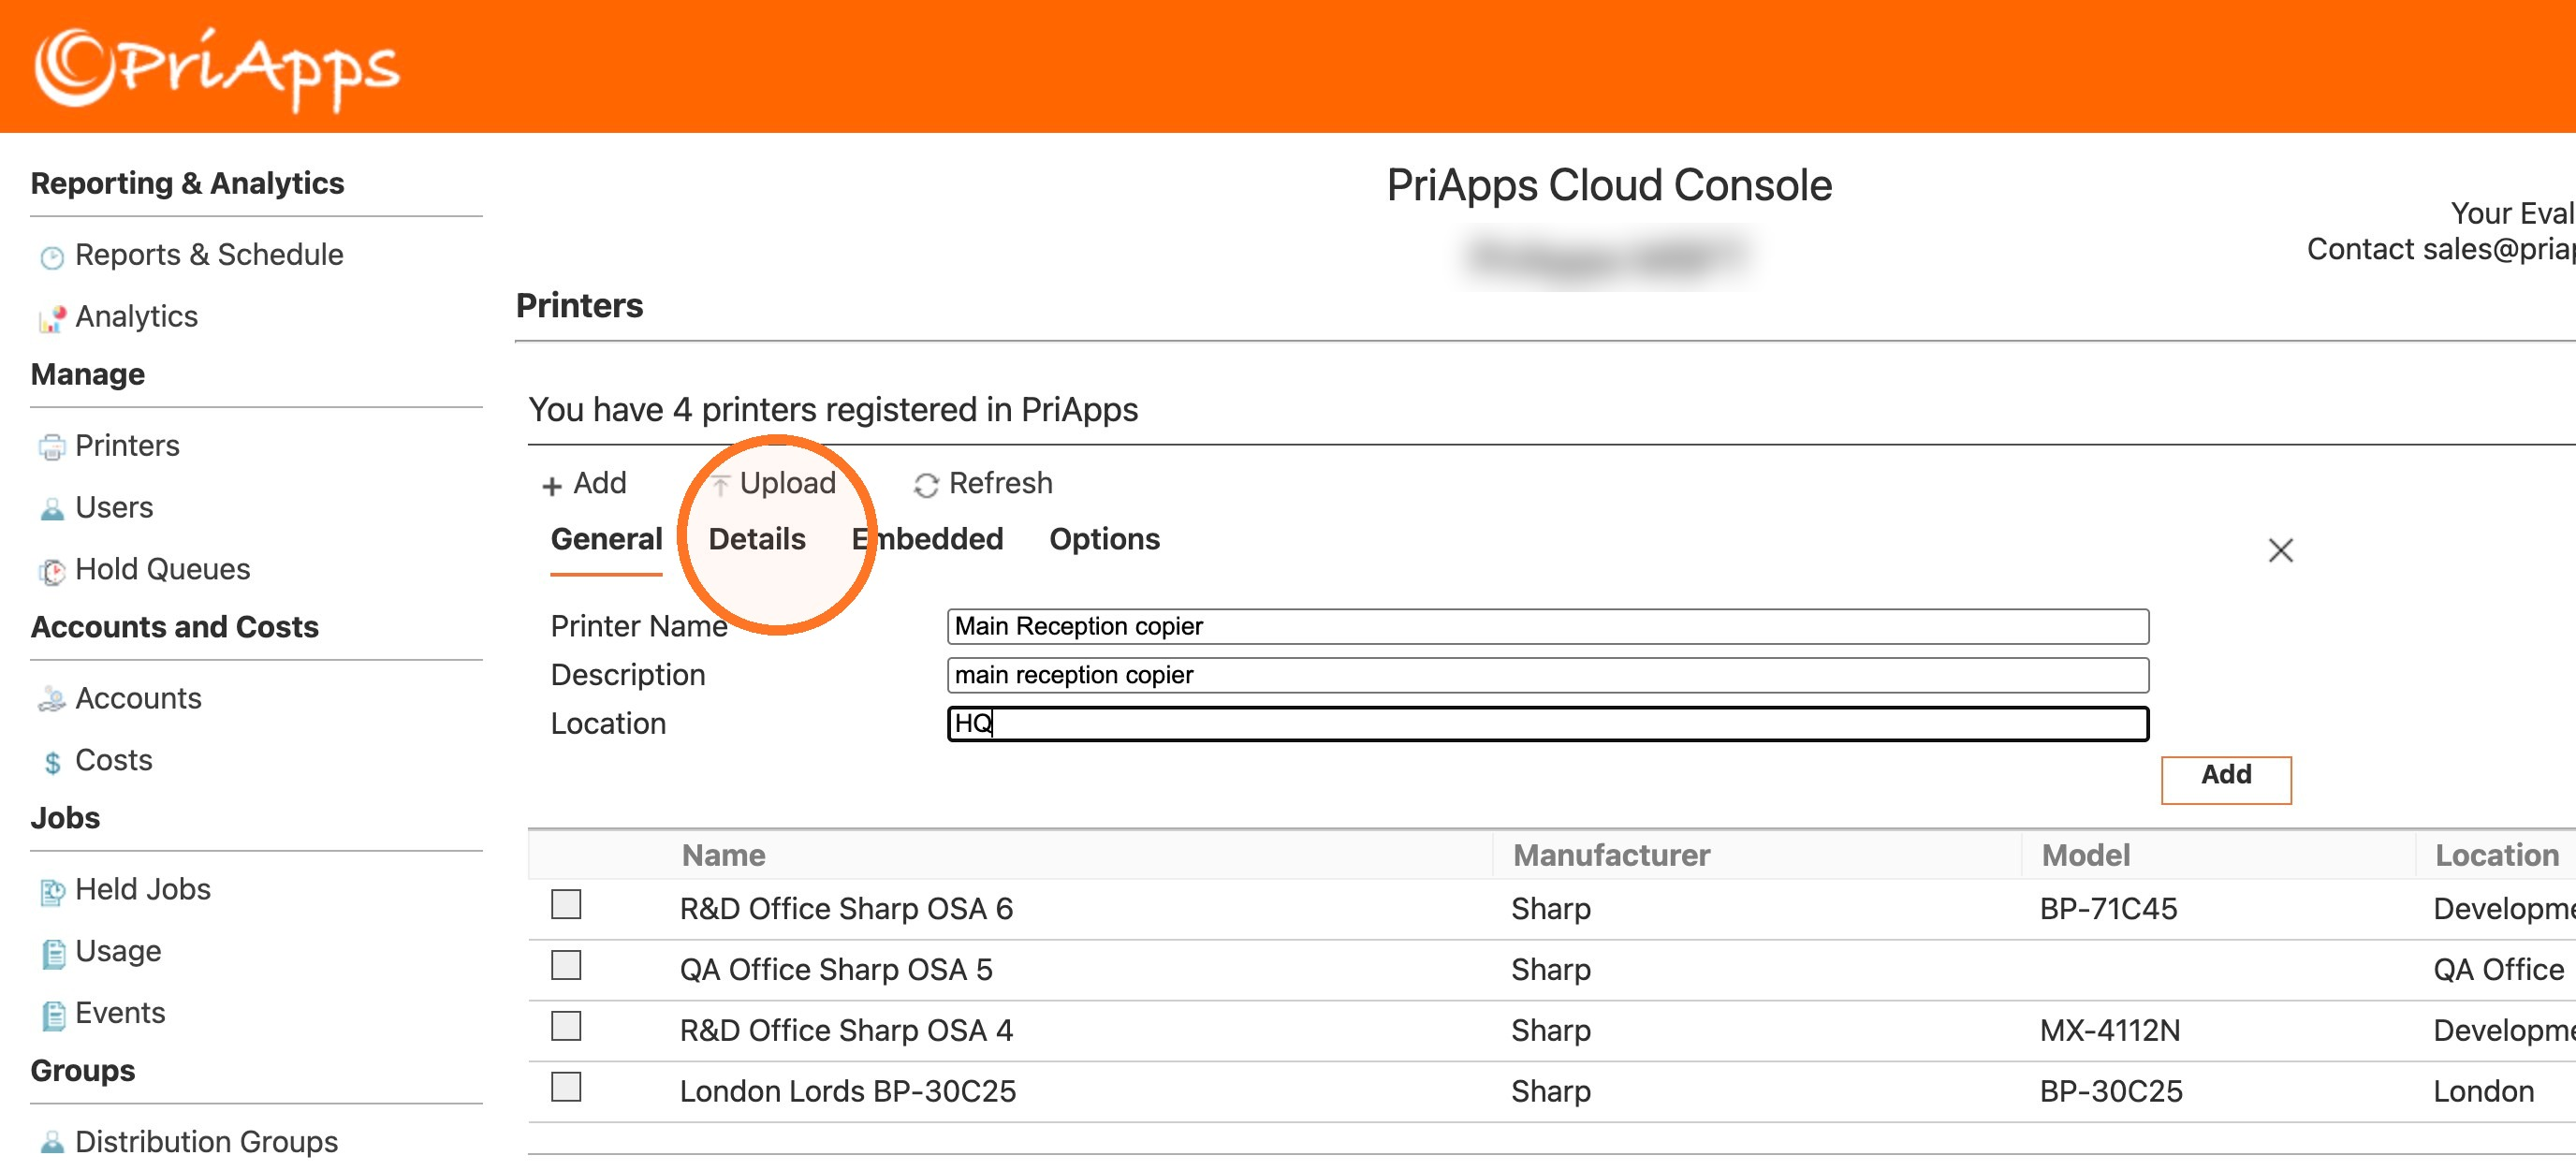
Fill in the General tab
Enter the Printer Name and Description, and optionally the Location. See General.
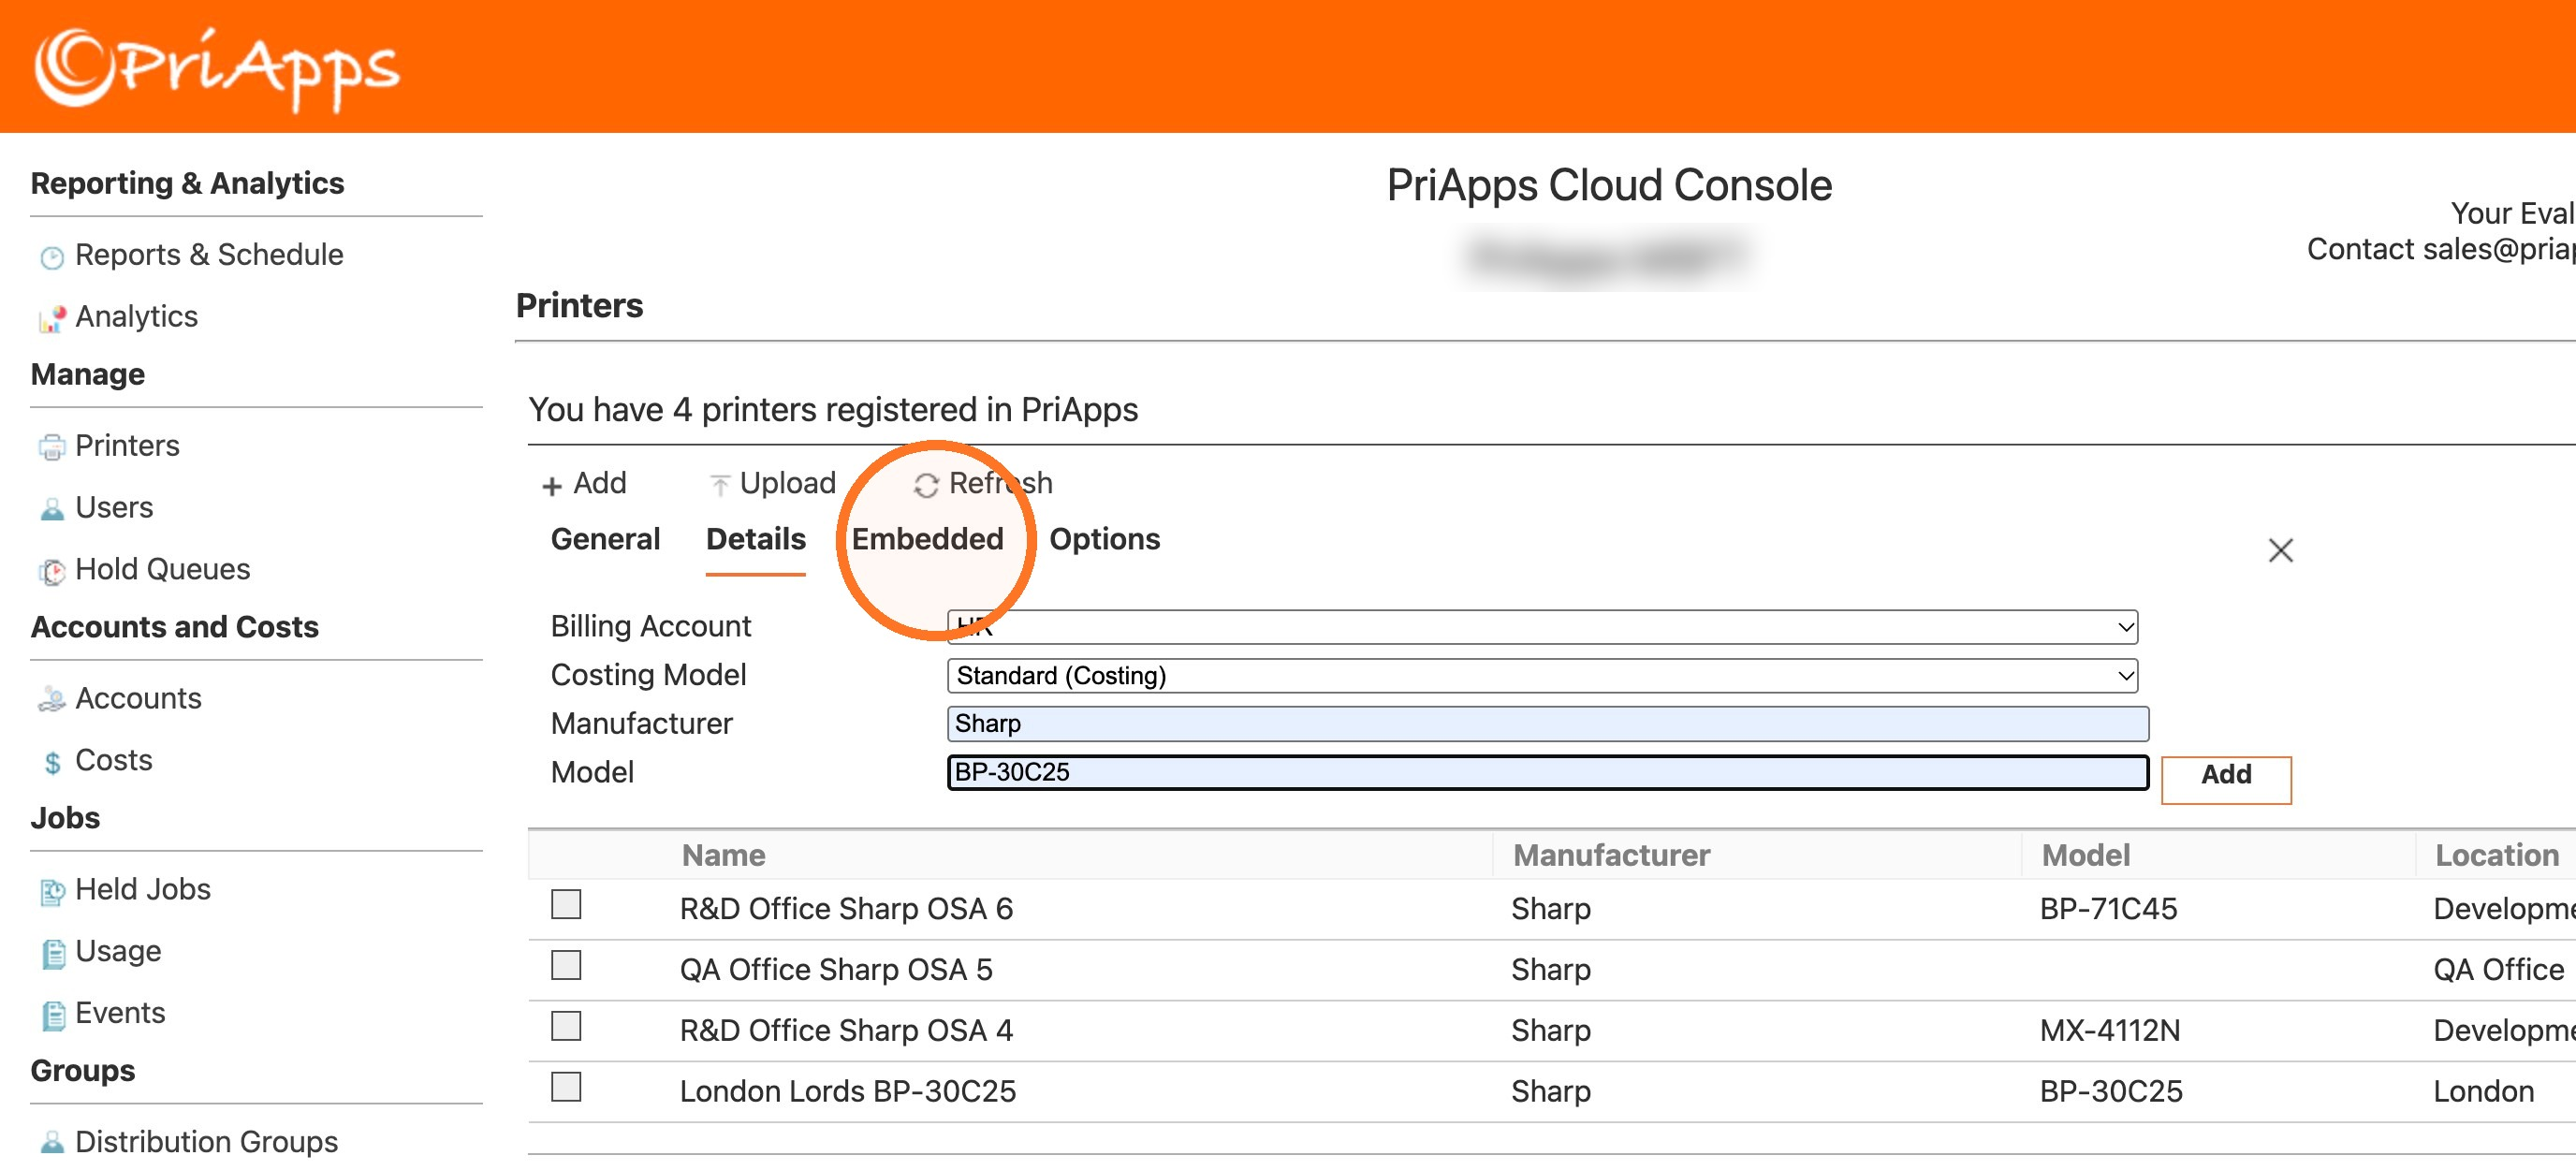
Fill in the Details tab
Select Details. Choose the Billing Account and Costing Model, and enter the Manufacturer and Model. See Details.
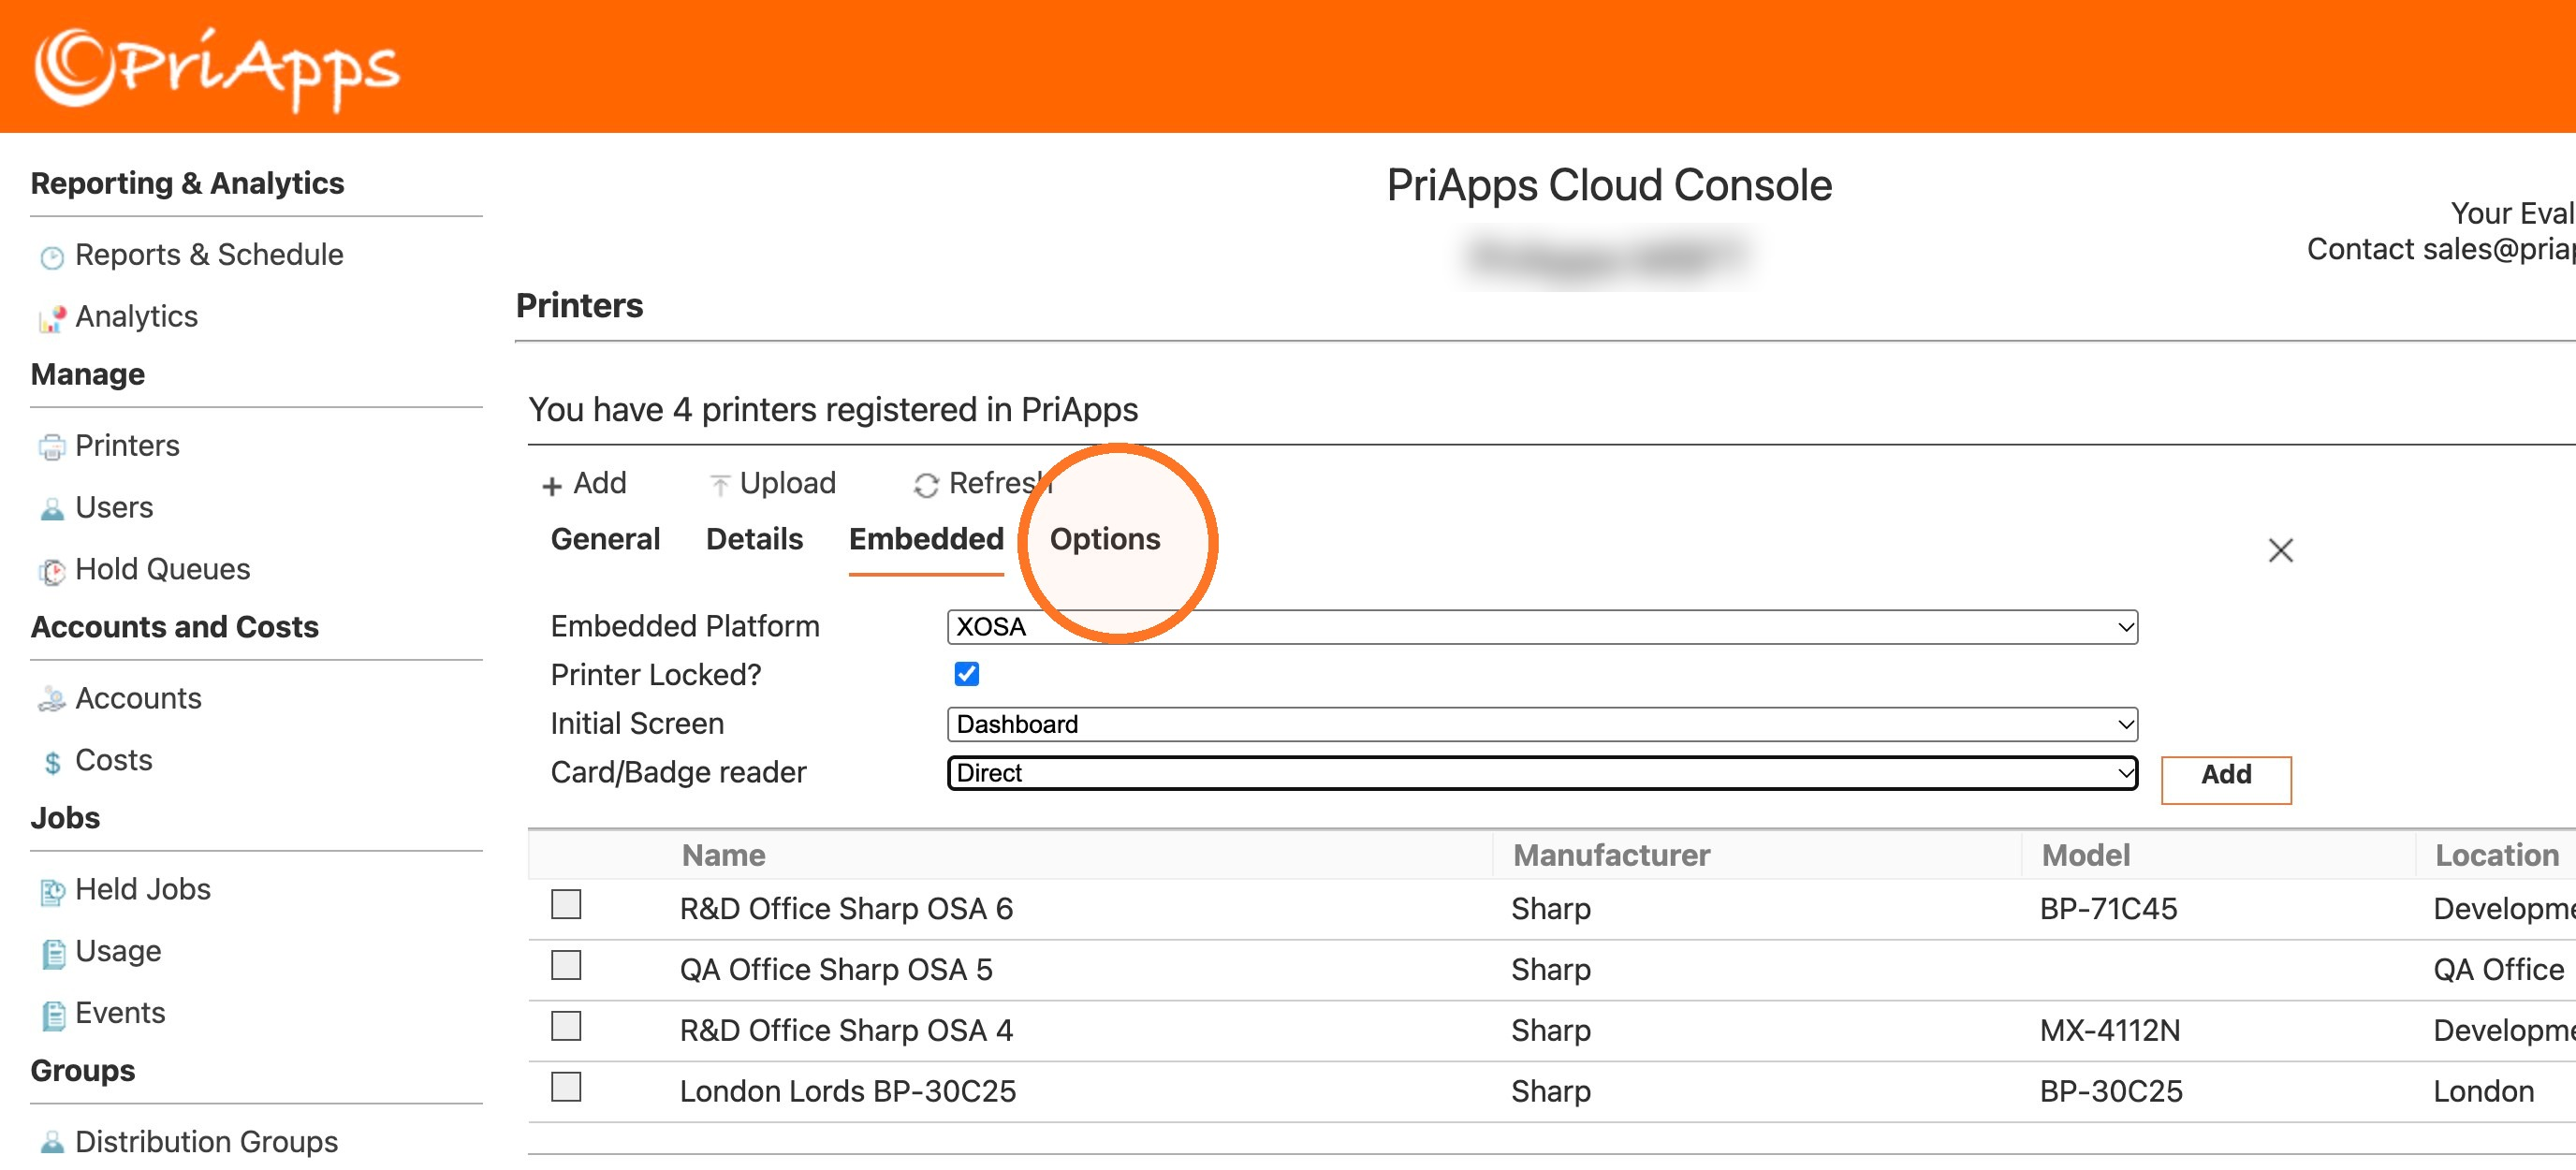
Fill in the Embedded tab
Select Embedded. Choose the Embedded Platform, select Printer Locked?, and choose the Initial Screen and Card/Badge reader. See Embedded.
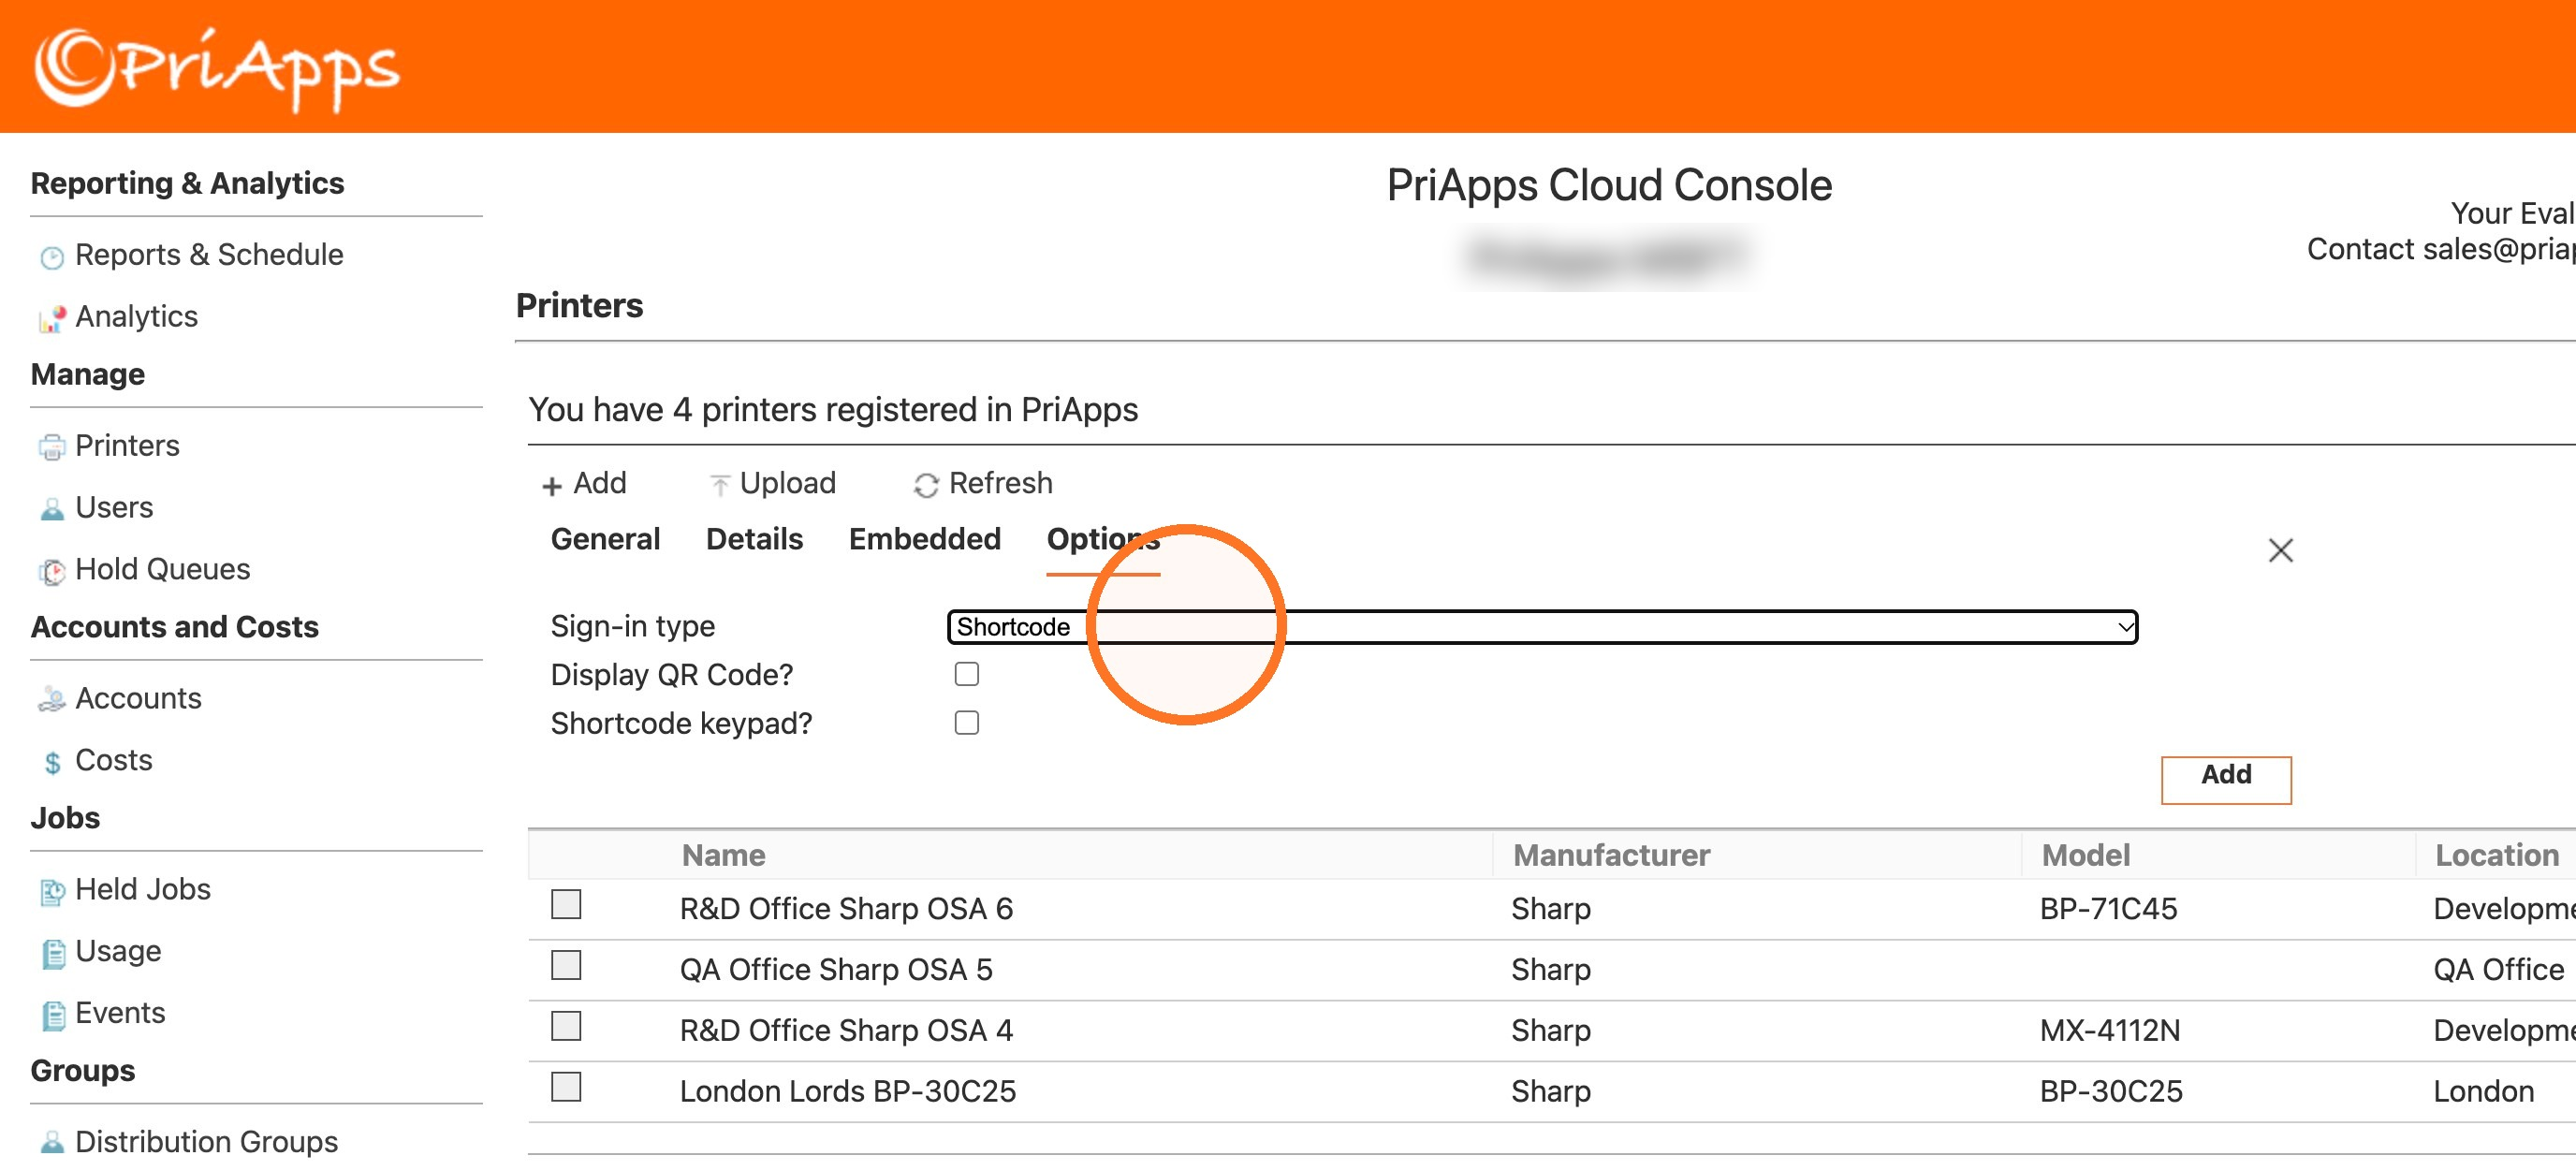
Fill in the Options tab
Select Options. Choose the Sign-in type and the options that go with it. See Options.
Select Add
Select Add to save the device.
Check that it worked
The device appears in the list on the Printers page, and the number of printers registered at the top of the page goes up by one. If it isn't shown, select Refresh.
Changing a device's settings
To change a device's settings later, select the check box next to it on the Printers page, then select Edit above the list. Its settings are on the same four tabs, described below.
General
| Setting | What it does |
|---|---|
| Printer Name | The name the device is listed under in the PriApps CloudPrint Console. |
| Description | A short description of the device. |
| Location | Optional. Where the device is, such as a building or an office. |
Details
| Setting | What it does |
|---|---|
| Billing Account | The device's default account for billing or chargeback. It's typically used for cost recovery. |
| Costing Model | The price model used to work out the cost of the device's usage. Price models are set up under Costs. |
| Manufacturer | The device's manufacturer. |
| Model | The device's model. |
Embedded
| Setting | What it does |
|---|---|
| Embedded Platform | The device's embedded platform. PriApps CloudPrint uses it to create the device's configuration settings automatically. |
| Printer Locked? | When selected, users must sign in at the device before they can use it. |
| Initial Screen | The screen users see on the device's touchscreen after they sign in. See the options below. |
| Card/Badge reader | None if the device has no card reader. Otherwise Direct or TTY, depending on the card reader. If you aren't sure, select Direct. |
The Initial Screen options are:
| Initial Screen | What users see |
|---|---|
| Home Page | The device's own home screen. |
| Secure Release | The PriApps CloudPrint print release screen, listing all the jobs the user can release. |
| Dashboard | The PriApps Dashboard, with a button for each function the user has permission to use, such as Print, Copy, Scan and Fax. |
| Copy | The copy settings screen in the PriApps CloudPrint MFP app. |
| Scan | The scan workflows the user has permission to use. |
Options
| Setting | What it does |
|---|---|
| Sign-in type | The sign-in screen users see at the device. See the options below. |
| Display QR Code? | Shows the device's own QR code on its touchscreen. Users can scan it with a PriApps mobile app to sign in at the device. |
| Shortcode keypad? | Shows a keypad on the touchscreen for entering a shortcode. |
The Sign-in type options are:
| Sign-in type | How users sign in |
|---|---|
| Shortcode | With their shortcode, typically a 4- or 6-digit number. |
| Shortcode & PIN | With their shortcode and a PIN, for two-factor authentication. |
| Microsoft | With the branded Microsoft sign-in screen. |
| Access code | With a code generated by PriApps, available in some PriApps mobile apps. |
| ID & Password | With their network ID and password. |
| All (show menu) | From a menu of all the sign-in types, choosing the one they want. |
Related articles
Removing MFPs, copiers and printers
Remove the MFPs, copiers and printers you no longer want PriApps CloudPrint to manage.
Registering users
Register users from Microsoft Entra ID so they can sign in at the printers, copiers and MFPs that PriApps CloudPrint manages.
Configuring users
Change a registered user's details, default cost account, role and sign-in settings in the PriApps CloudPrint Console.
Signing in to the PriApps CloudPrint Console
Open the PriApps CloudPrint Console and sign in with your organization's Microsoft account.