
Billing and cost accounts
Create the billing accounts that usage is charged to, and the cost accounts that track what it costs, for clients, projects, departments, printers and users.
Accounts are how PriApps CloudPrint charges and tracks usage. Billing accounts charge usage to a client, a project or a department. Cost accounts track the actual cost of a printer's or a user's usage, for reporting. Each account has a pricing model, of either type. See Pricing models.
| Account type | What it's for |
|---|---|
| Client Billing Account | Charging usage to a client, for example the client of a law firm. |
| Project Billing Account | Charging usage to a project. |
| Department Billing Account | Charging usage to a department. |
| Printer Cost Account | Tracking the cost of a printer's usage. |
| User Cost Account | Tracking the cost of a user's usage. |
A printer's default billing account is set in its Billing Account setting, and a user's default cost account in their Cost Account setting. See Adding MFPs, copiers and printers and Configuring users.
Before you begin
- Sign in to the PriApps CloudPrint Console. See Signing in to the PriApps CloudPrint Console.
- Create the pricing model the account will use. See Pricing models.
Create an account
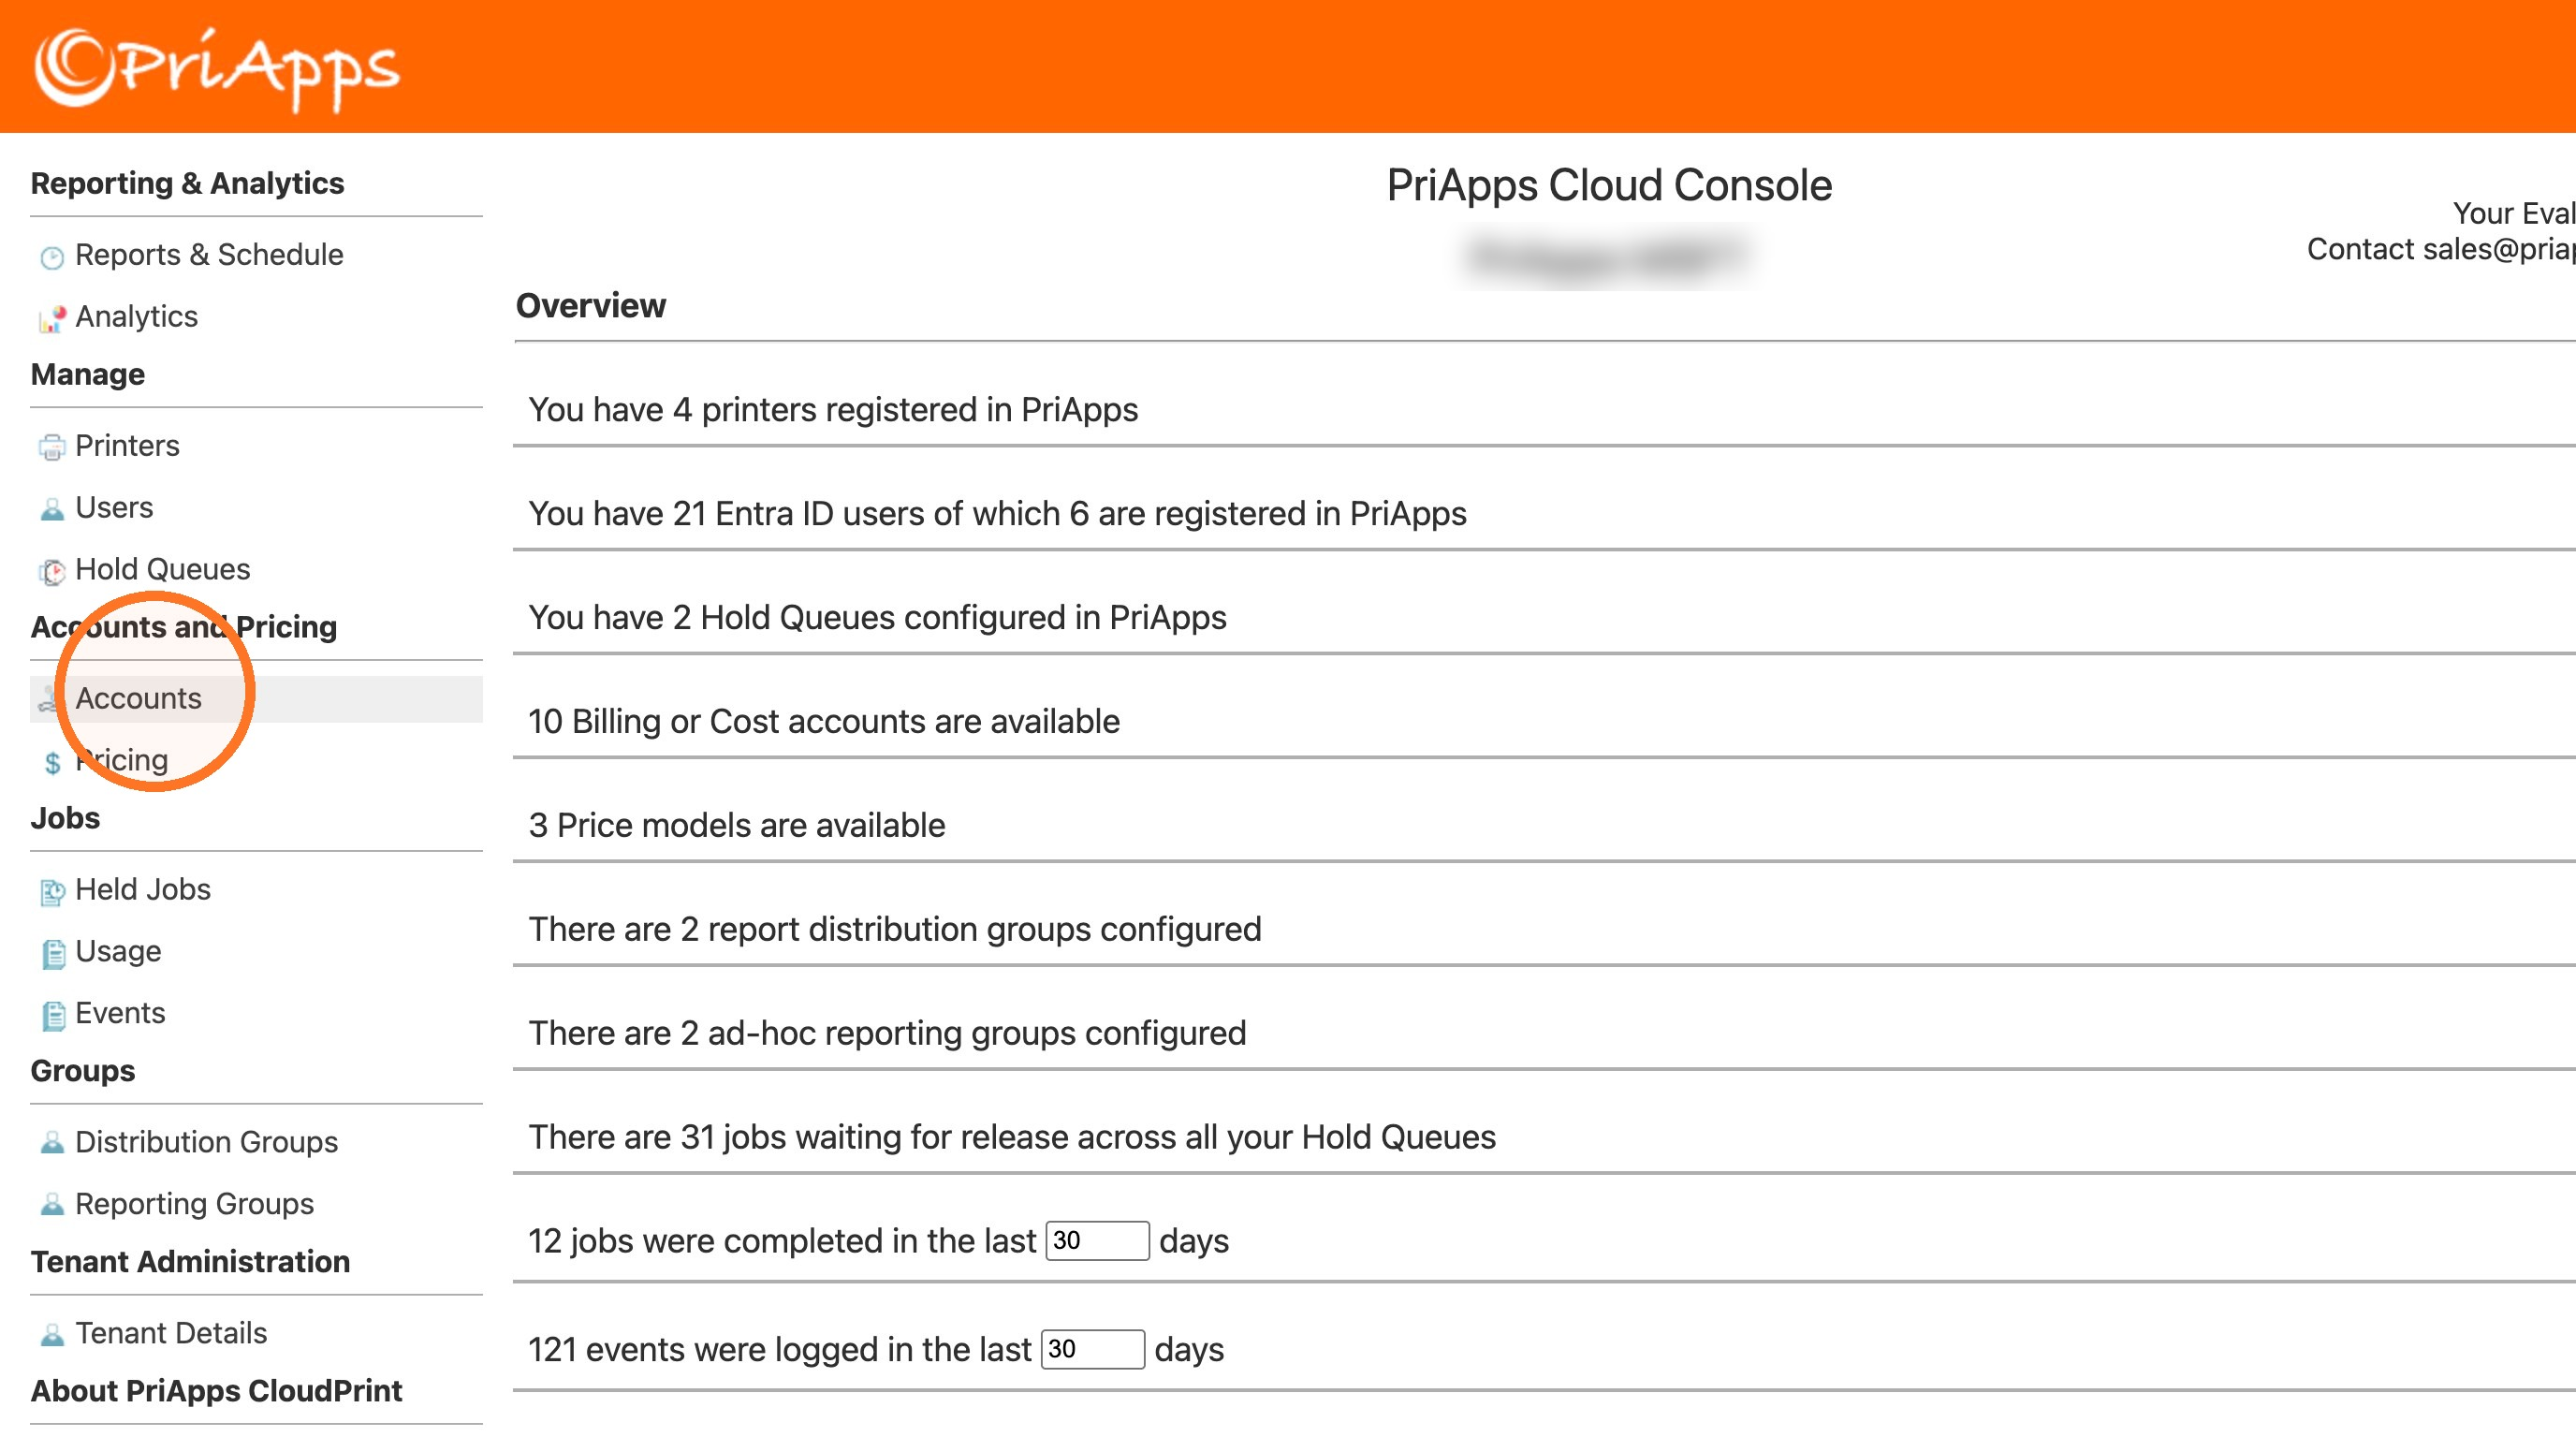
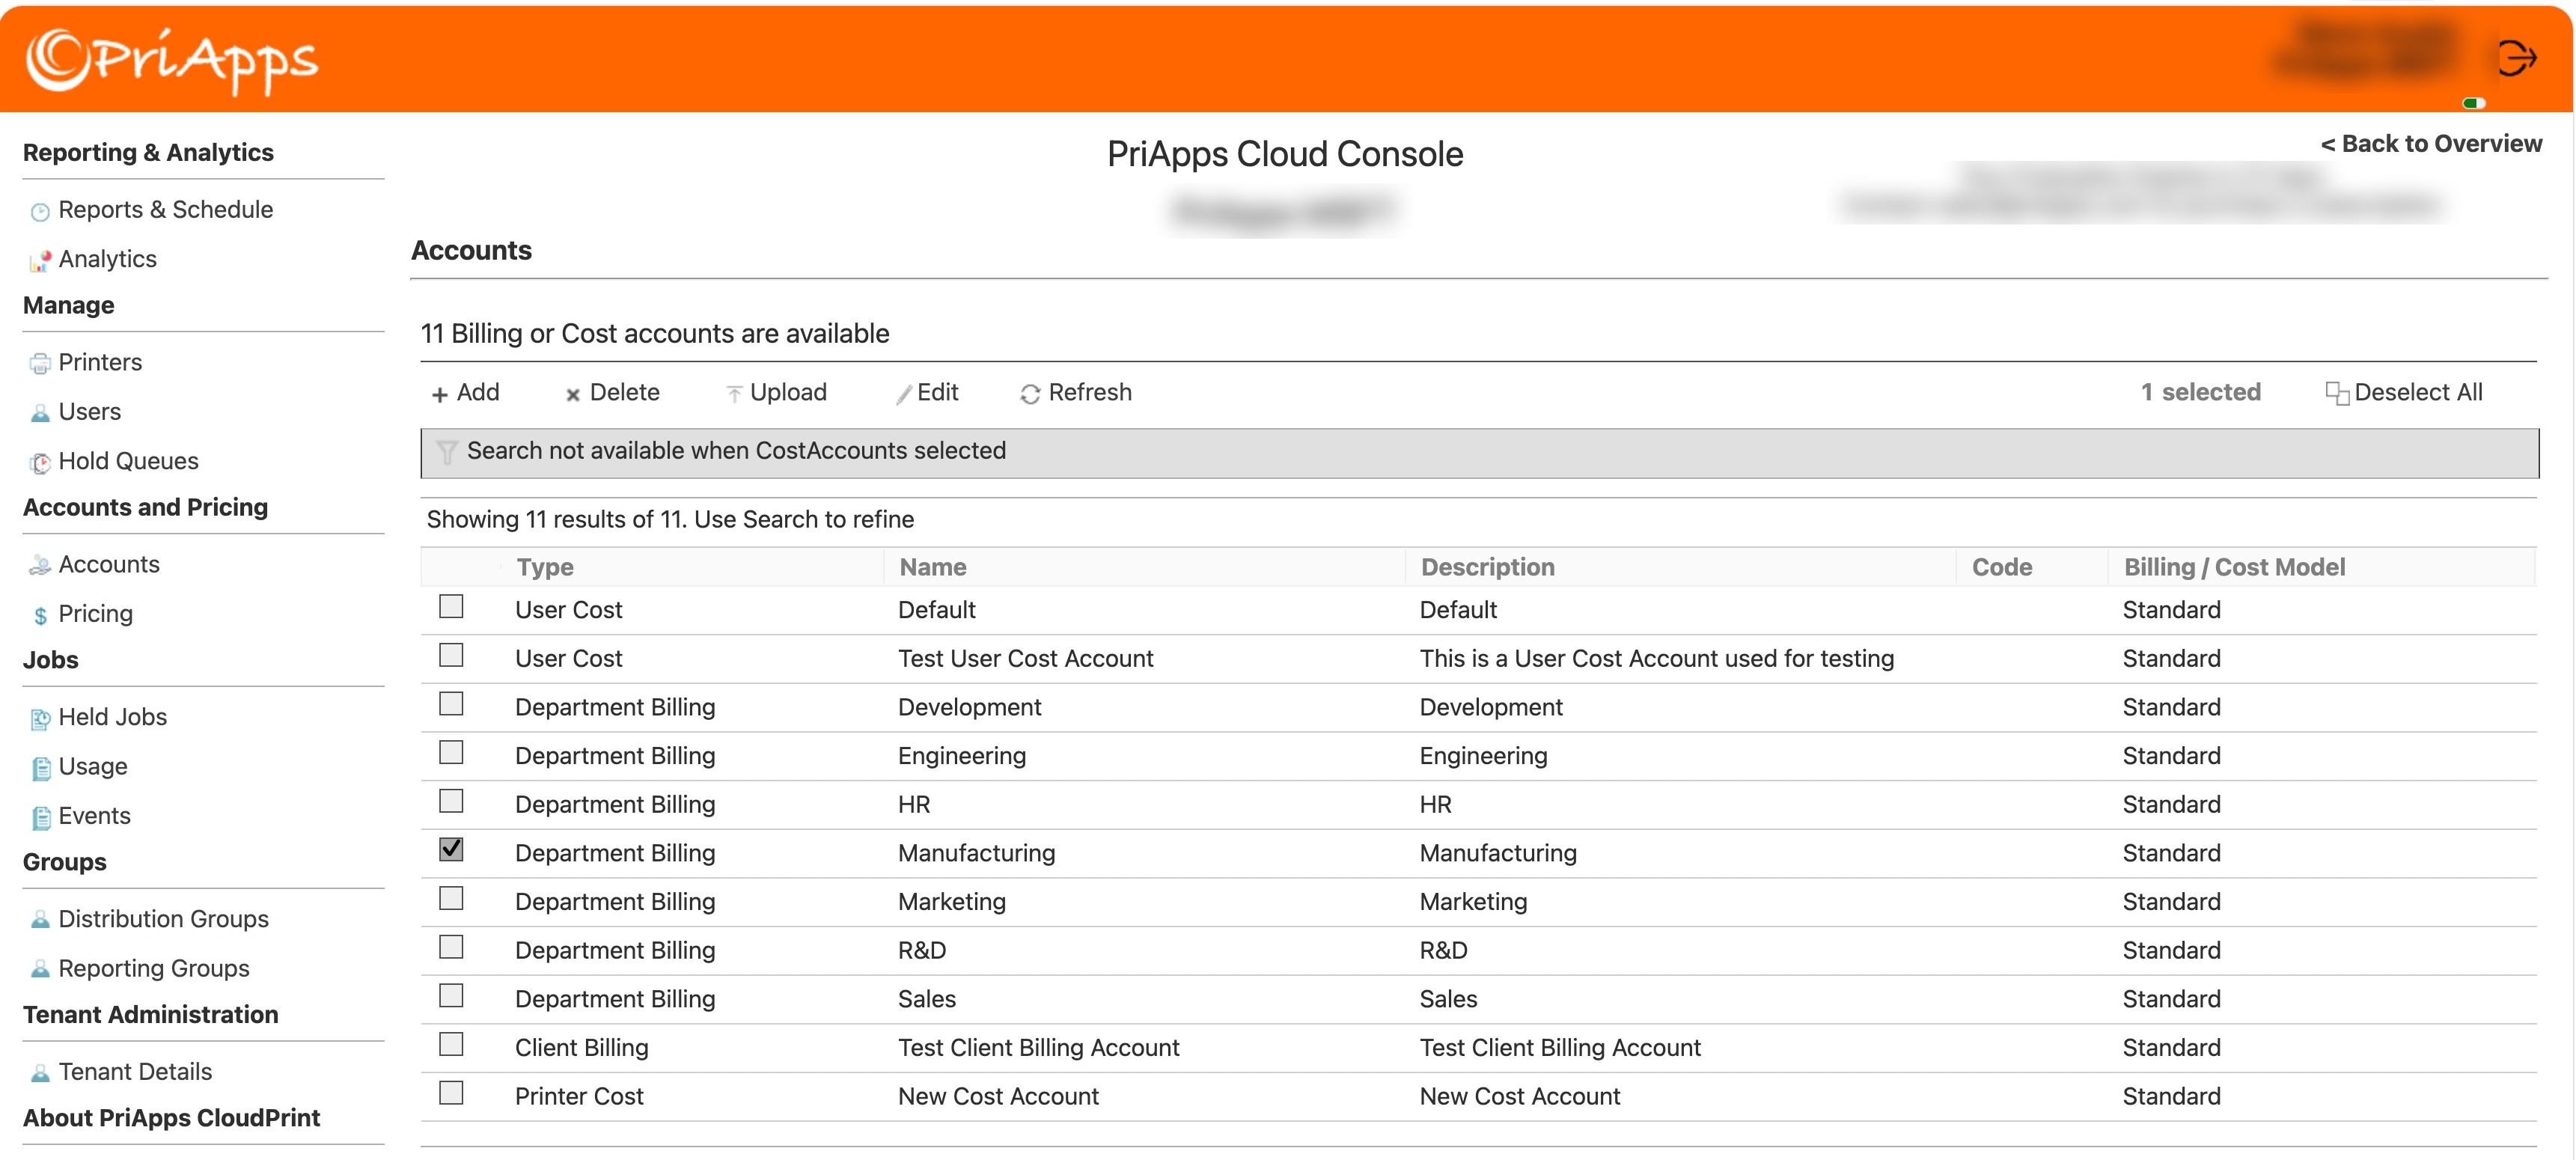
Open Accounts
In the menu, under Accounts and Pricing, select Accounts.
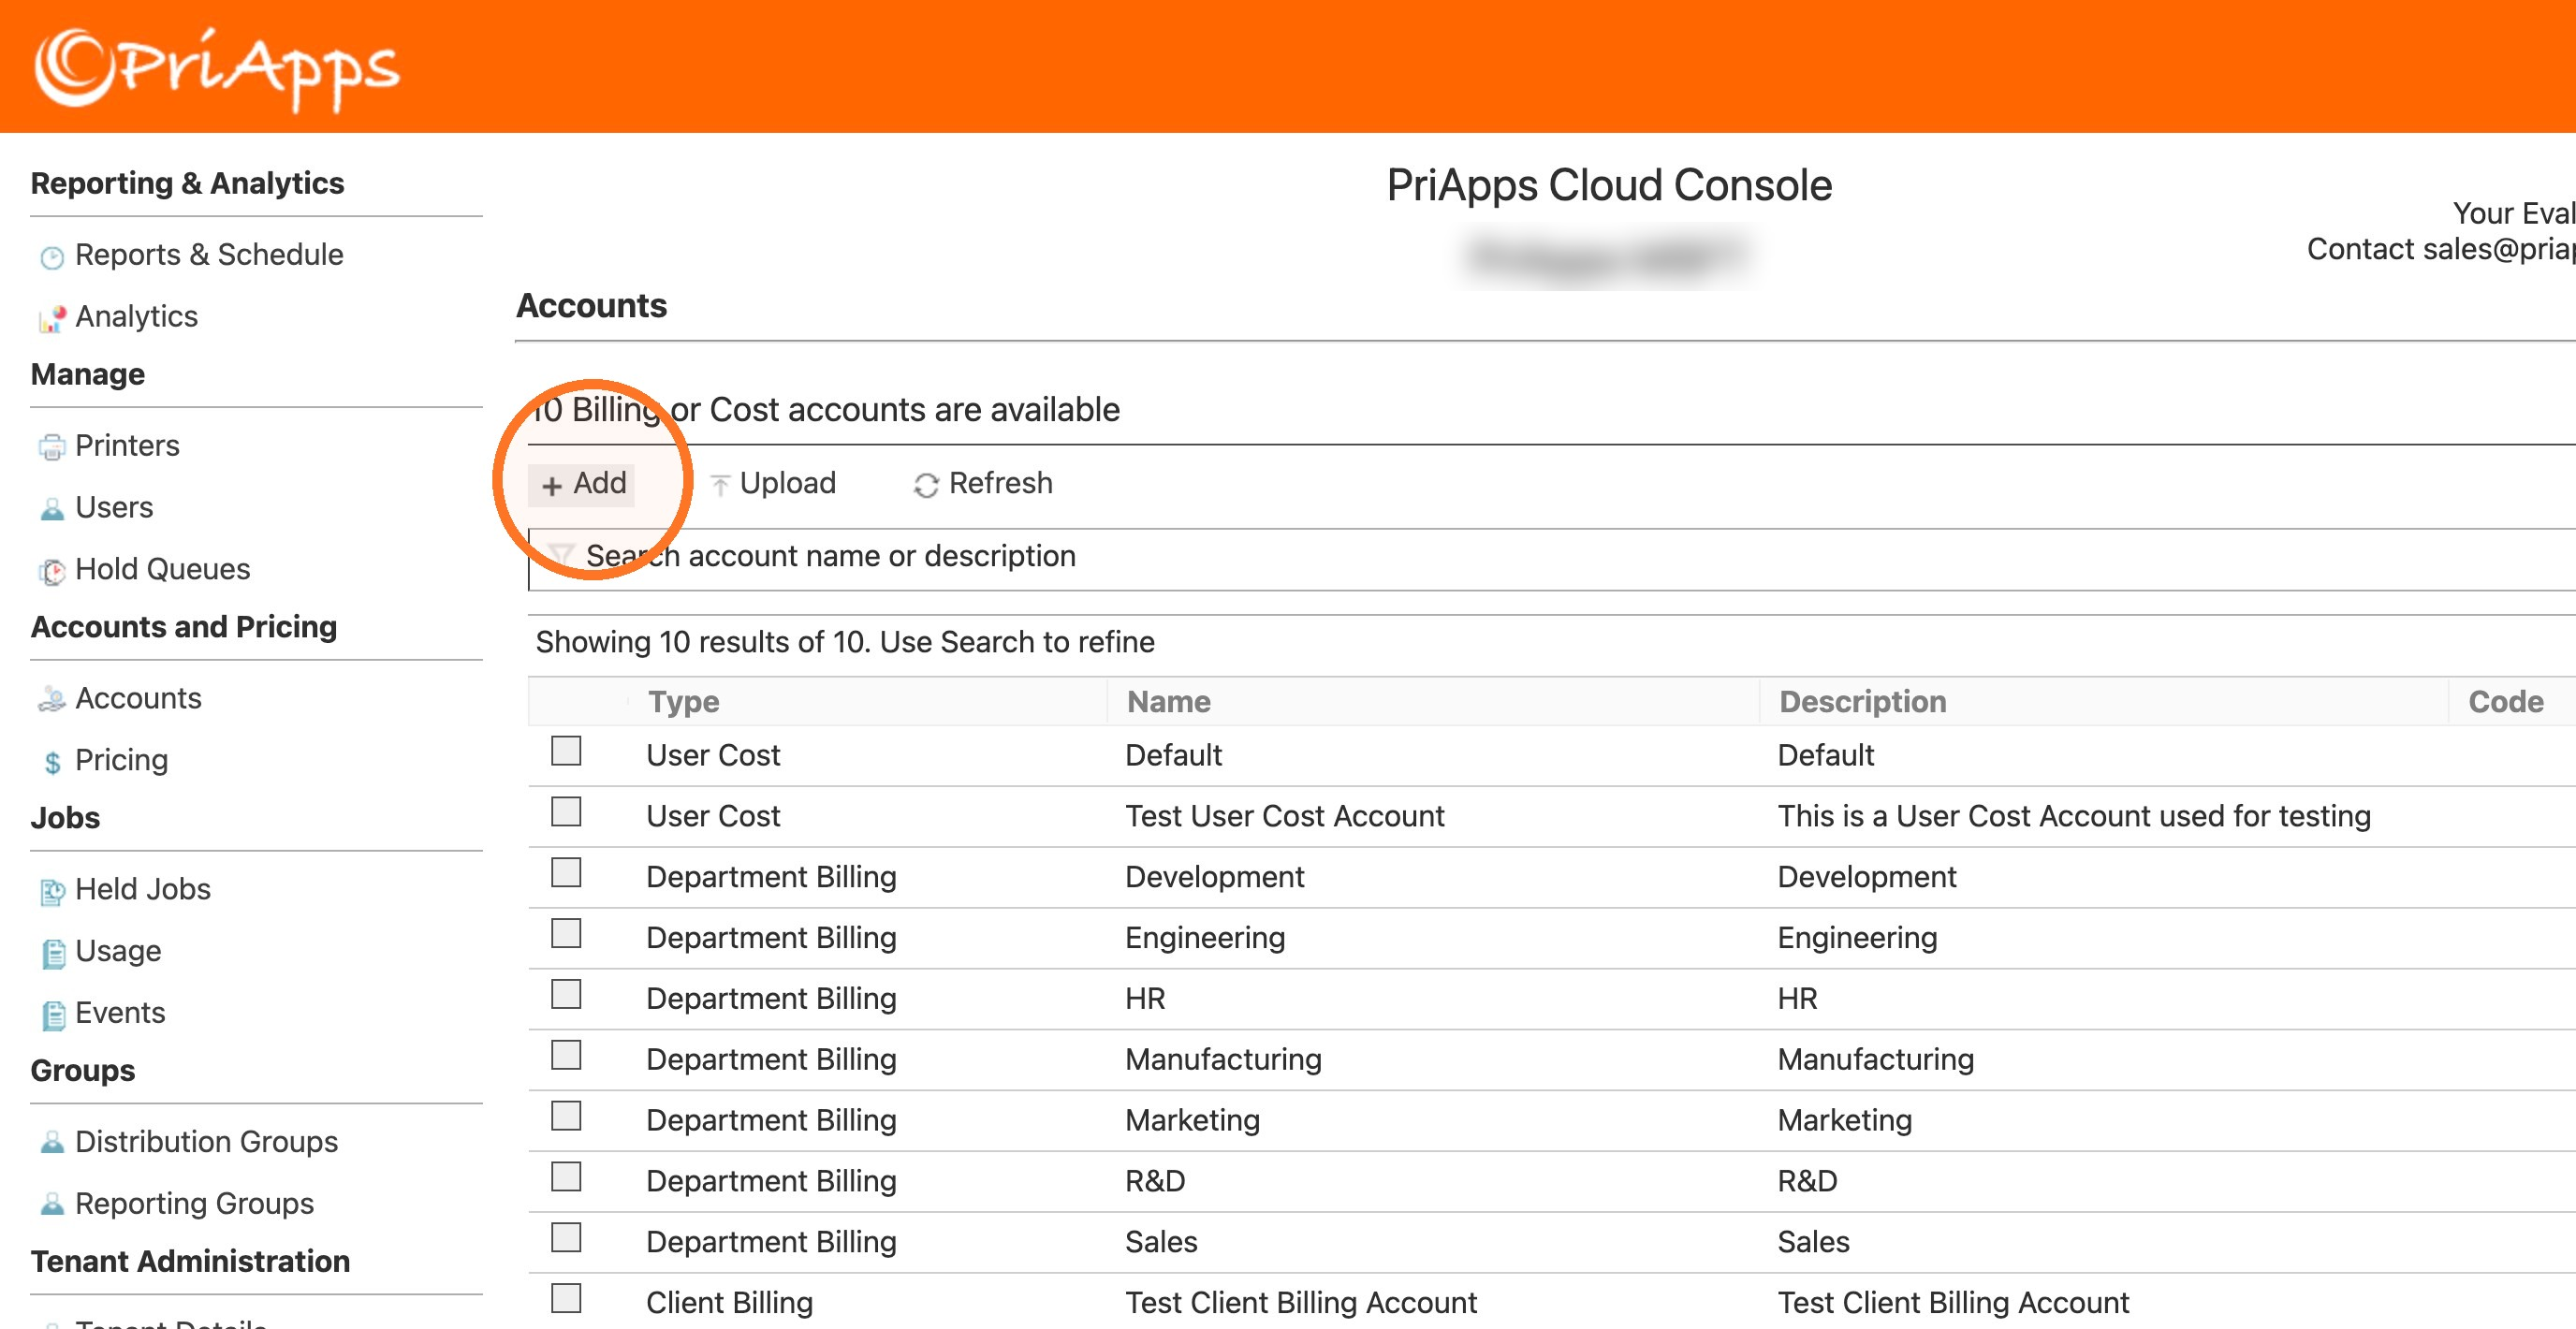
Select Add
Above the list of accounts, select Add. The settings open above the list, on two tabs.
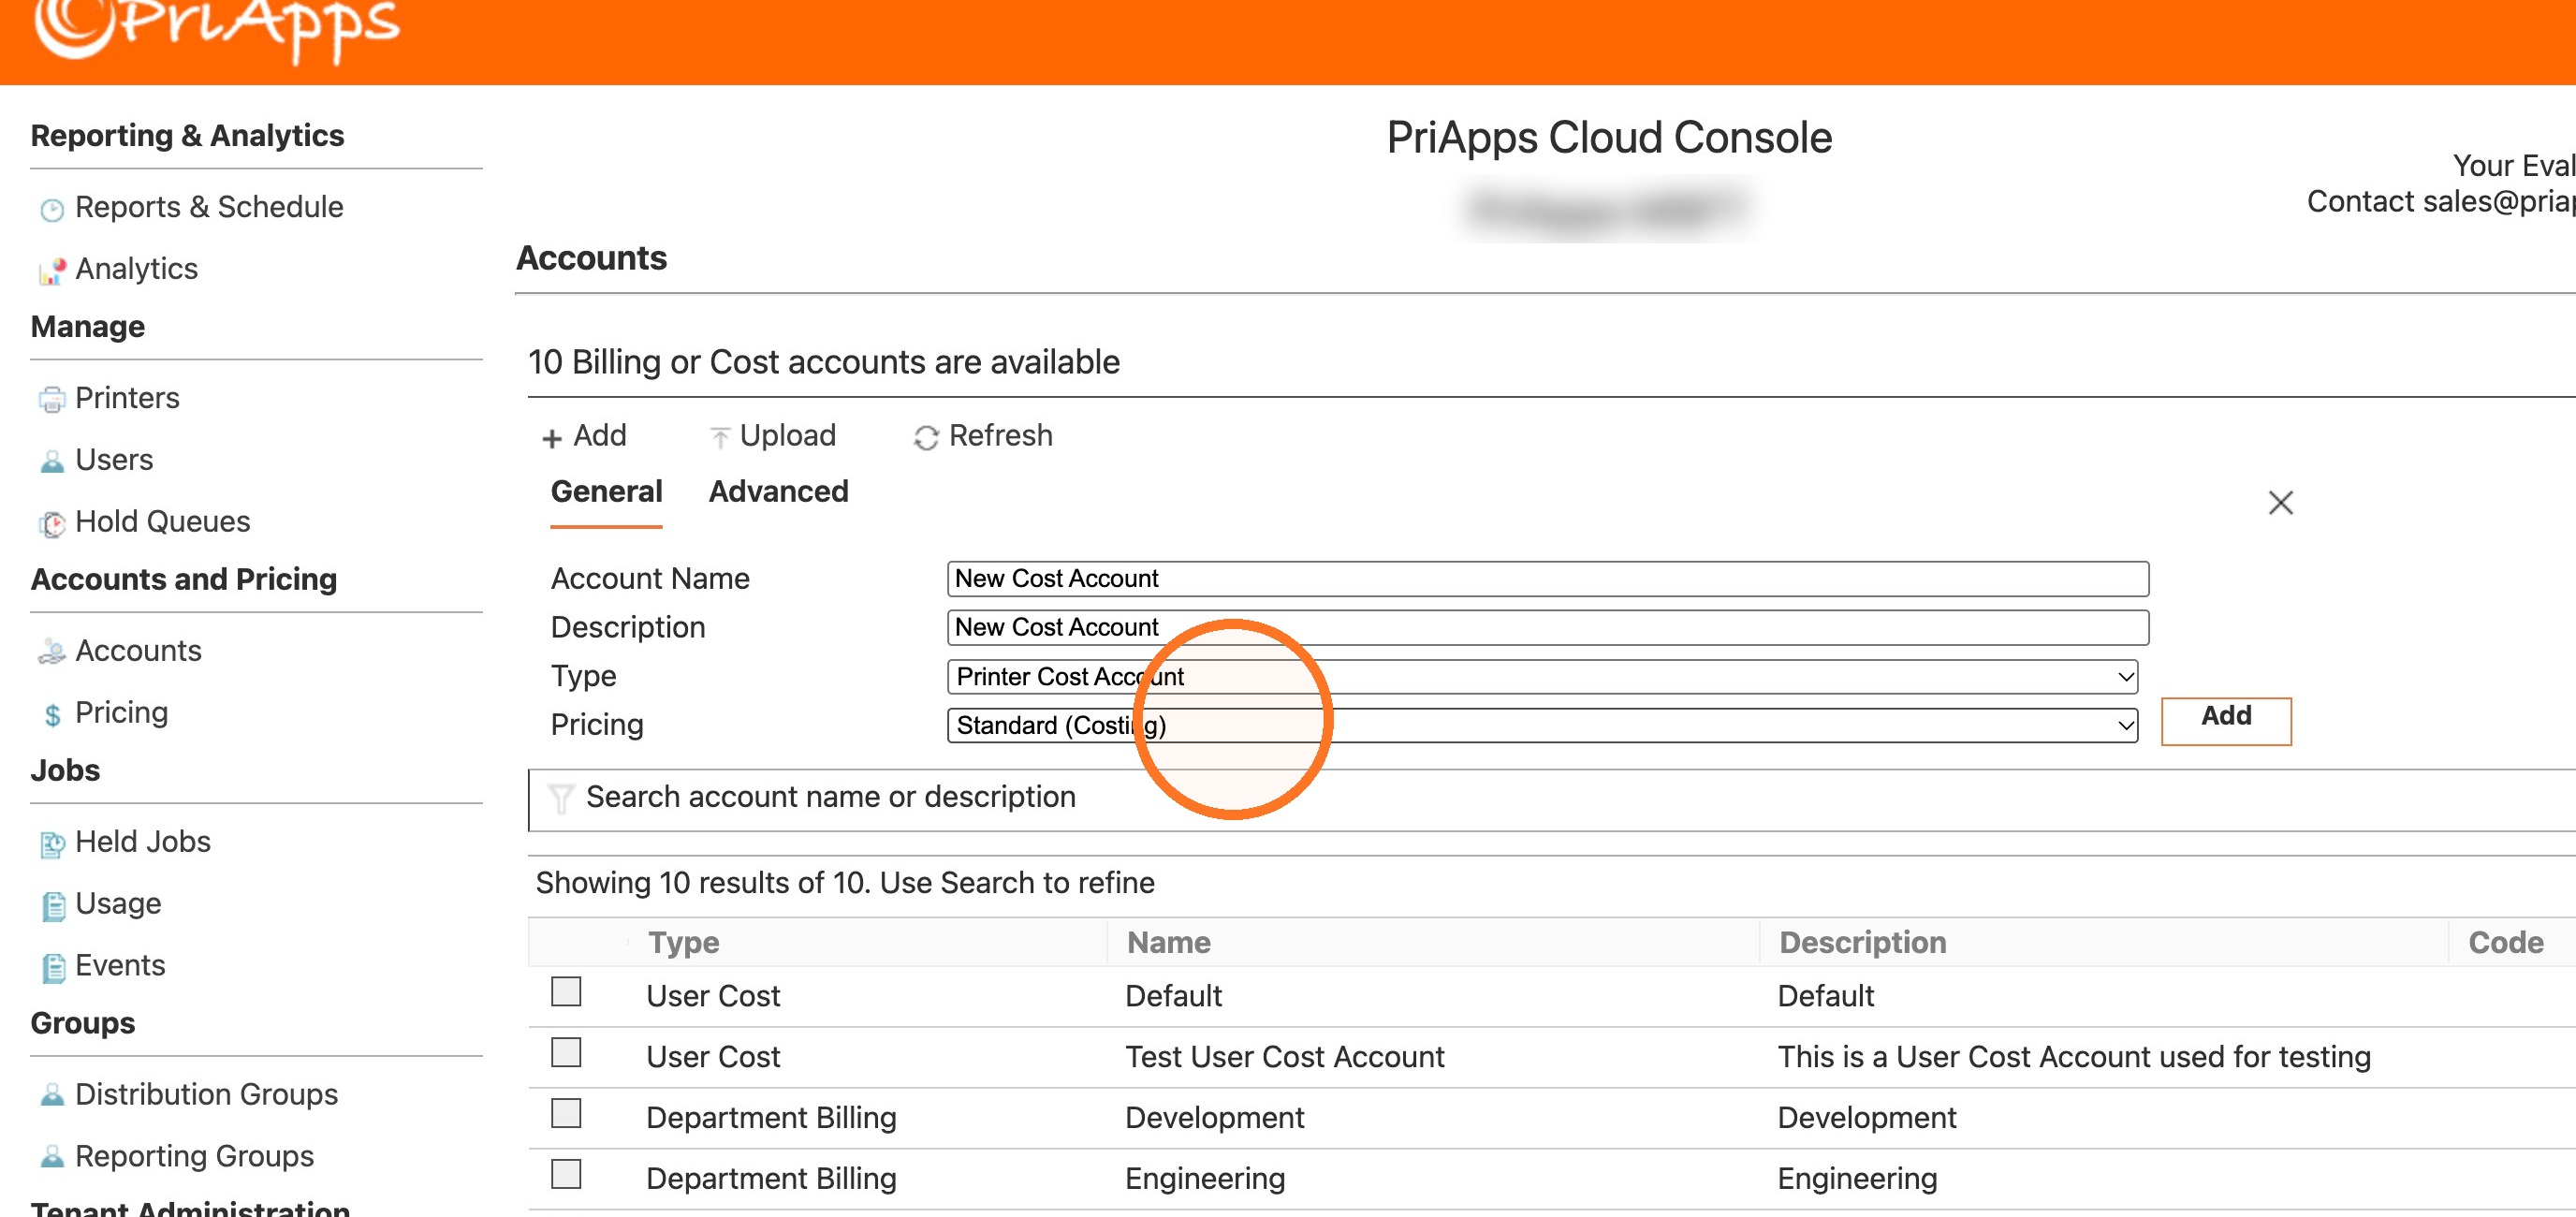
Enter the account details
On the General tab, enter the Account Name and Description, choose the Type, and choose the Pricing model the account uses.
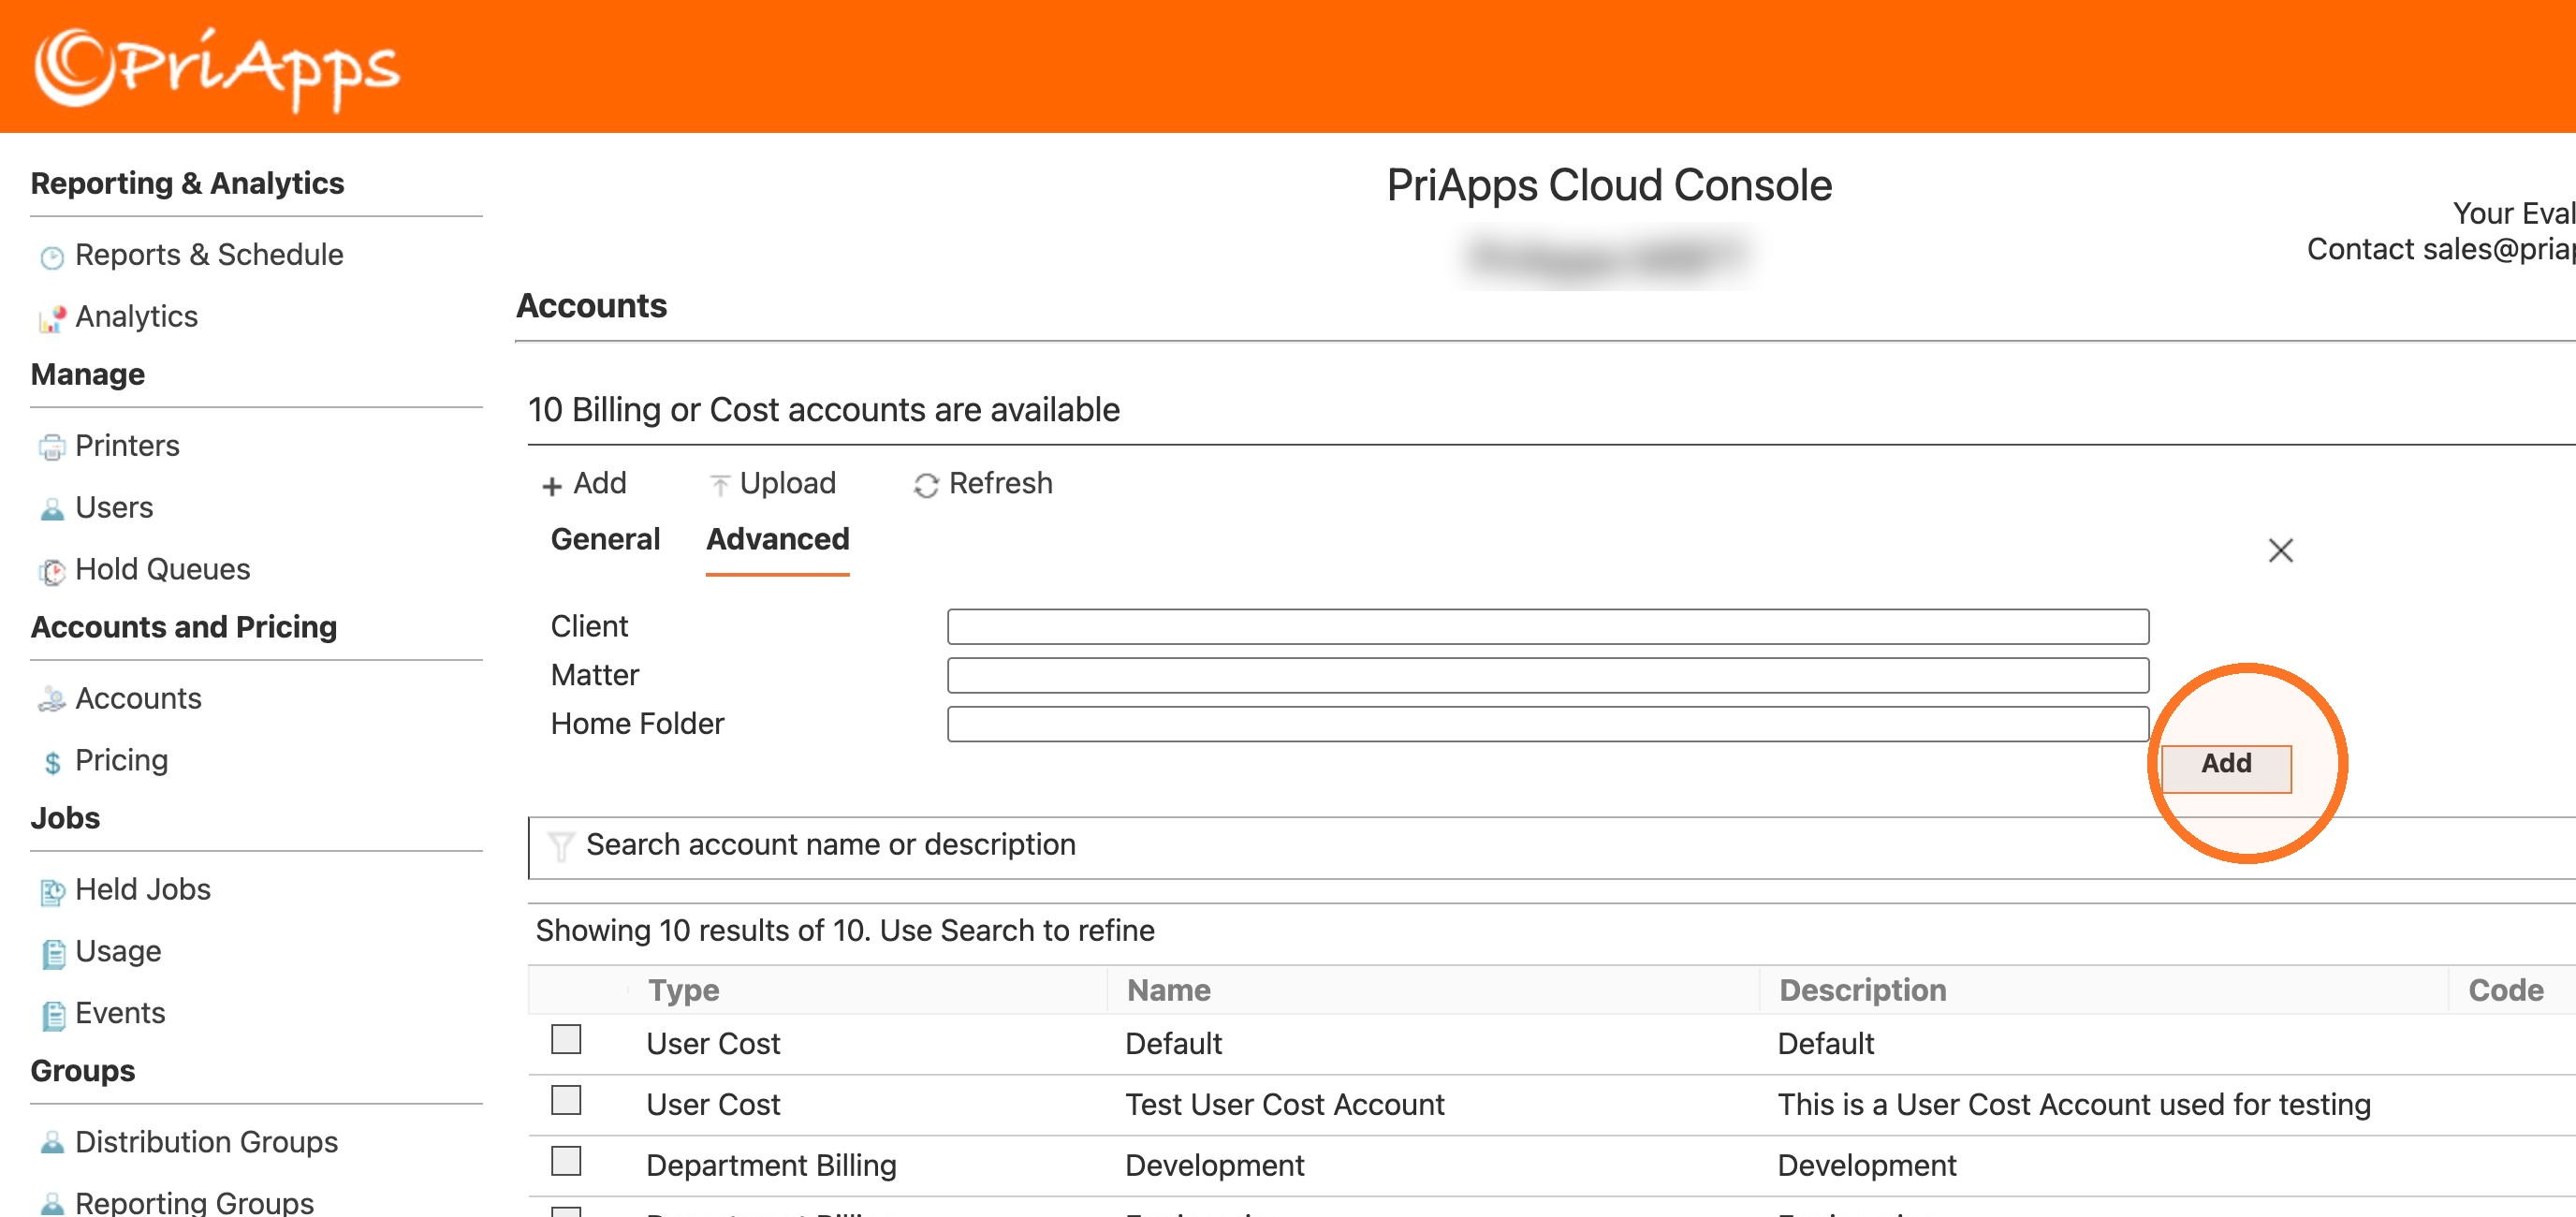
Enter the advanced details, if needed
Select Advanced. For a Client Billing Account, enter its Client and Matter IDs.
To give the account a scan destination, enter its Home Folder. When a user selects the account in the PriApps CloudPrint MFP app, its home folder is added to their scan workflow destinations automatically.
Select Add
Select Add. When the Saved message appears, select OK.
Check that it worked
The new account appears in the list, and the number of billing or cost accounts available at the top of the page goes up by one.
Find, change or delete an account
- Find an account: type part of its name or description in the search box above the list. Search isn't available while accounts are selected.
- Change an account: select the check box next to it, then select Edit above the list.
- Delete an account: select the check box next to it, then select Delete above the list.
Related articles
Pricing models
Create the pricing models PriApps CloudPrint uses to work out the cost of usage, or the price you charge for it, for mono, color and paper.
Adding MFPs, copiers and printers
Add an MFP, copier or printer to PriApps CloudPrint, and choose how its usage is charged and how users sign in at it.
Configuring users
Change a registered user's details, default cost account, role and sign-in settings in the PriApps CloudPrint Console.
Report scheduling
Schedule usage and cost reports to be sent to a distribution group as PDF or CSV files, once or on a regular schedule.