
Creating hold queues
Create myQueue hold queues in PriApps CloudPrint, so users' print jobs are held securely in your cloud storage until they release them at a printer.
A myQueue is a personal hold queue for each user. It's an IPP print queue rather than a print driver, which gives your organization a modern, more secure way to print. When a user prints to a myQueue, the job is held securely in your organization's cloud storage until the user releases it at a printer or MFP managed by PriApps CloudPrint, using the PriApps MFP app, the PriApps smartphone app or the card reader supplied by PriApps.
PriApps CloudPrint creates your first myQueue when your organization is onboarded. PriApps recommends creating more than one, to spread the load and improve performance, and deploying each one to a different group of users, typically by location or site.
Before you begin
- Sign in to the PriApps CloudPrint Console. See Signing in to the PriApps CloudPrint Console.
Create a myQueue
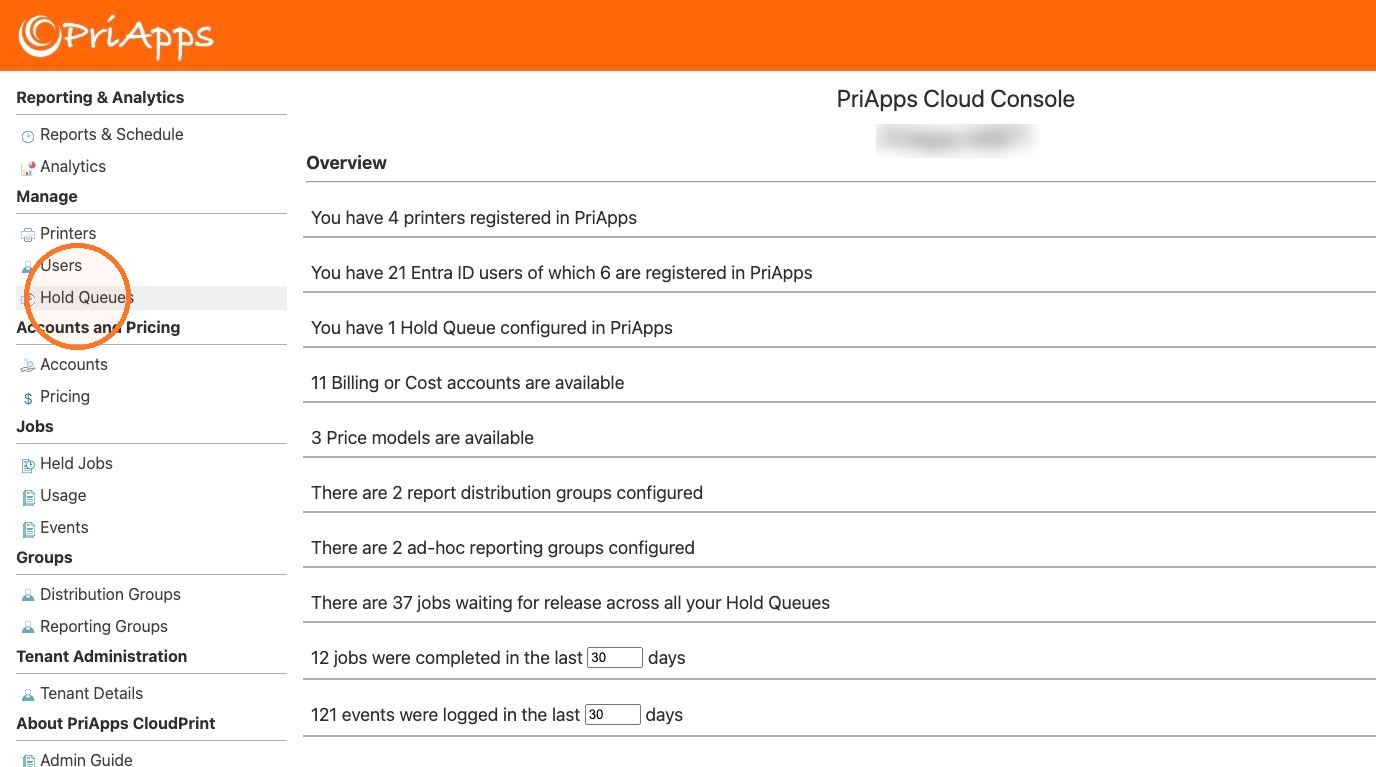
Open Hold Queues
In the menu, under Manage, select Hold Queues.
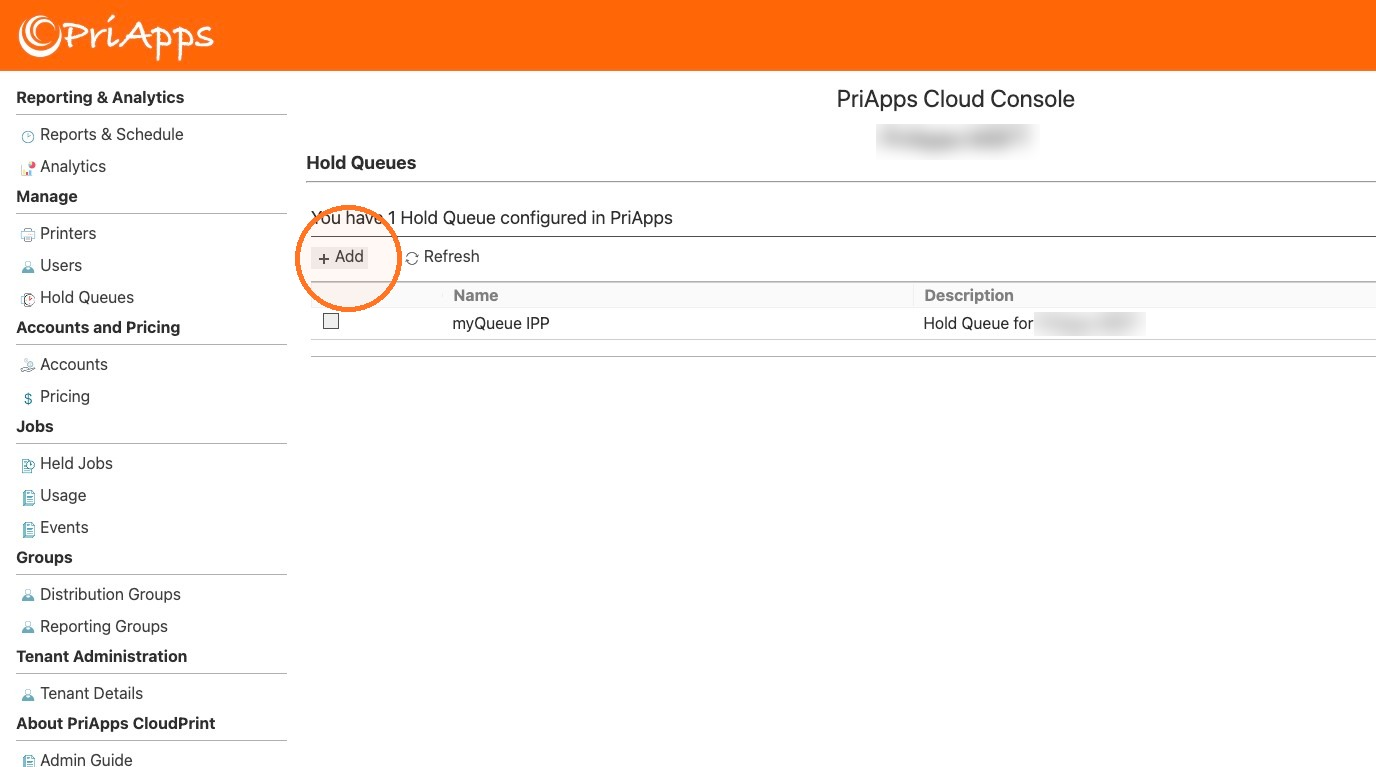
Select Add
Above the list of hold queues, select Add.
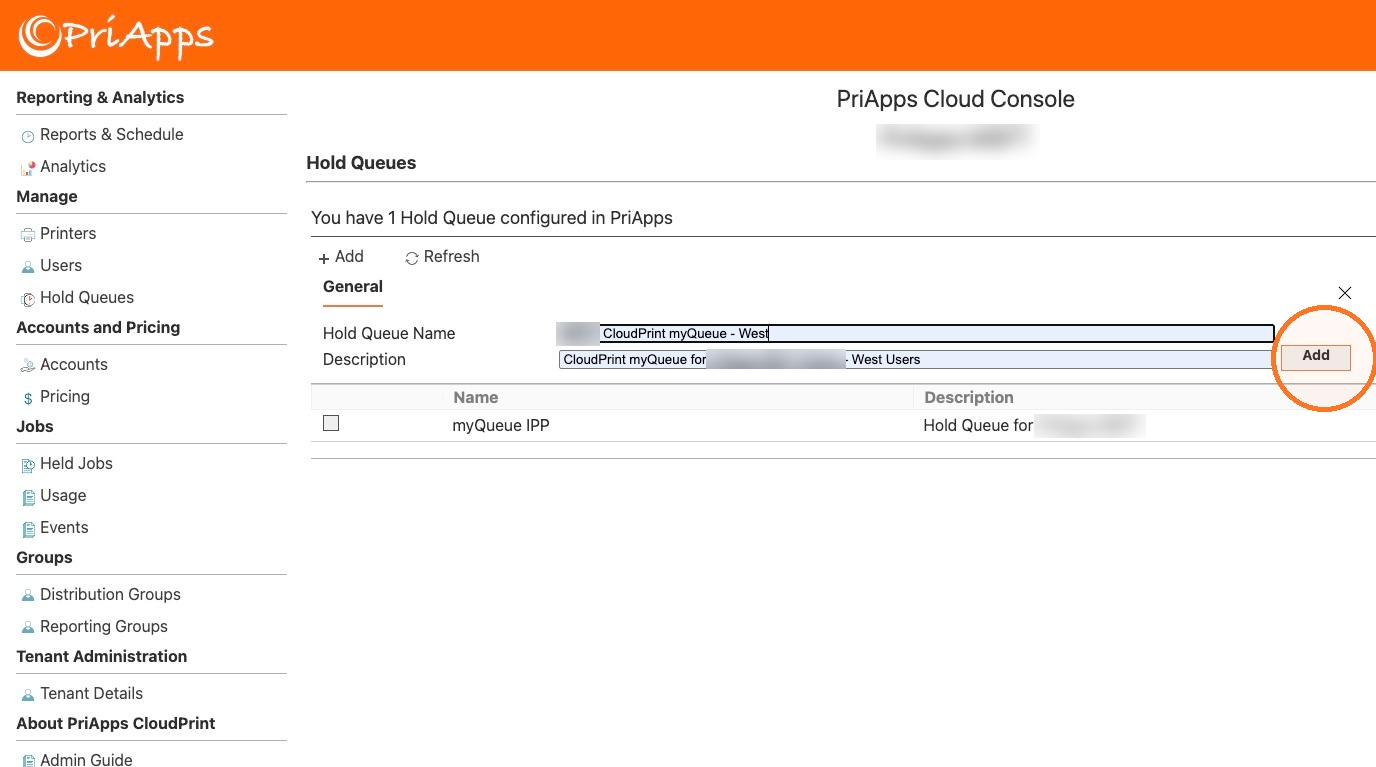
Enter the name and description
Enter a Hold Queue Name and a Description, for example naming the site or the group of users it's for. Then select Add.
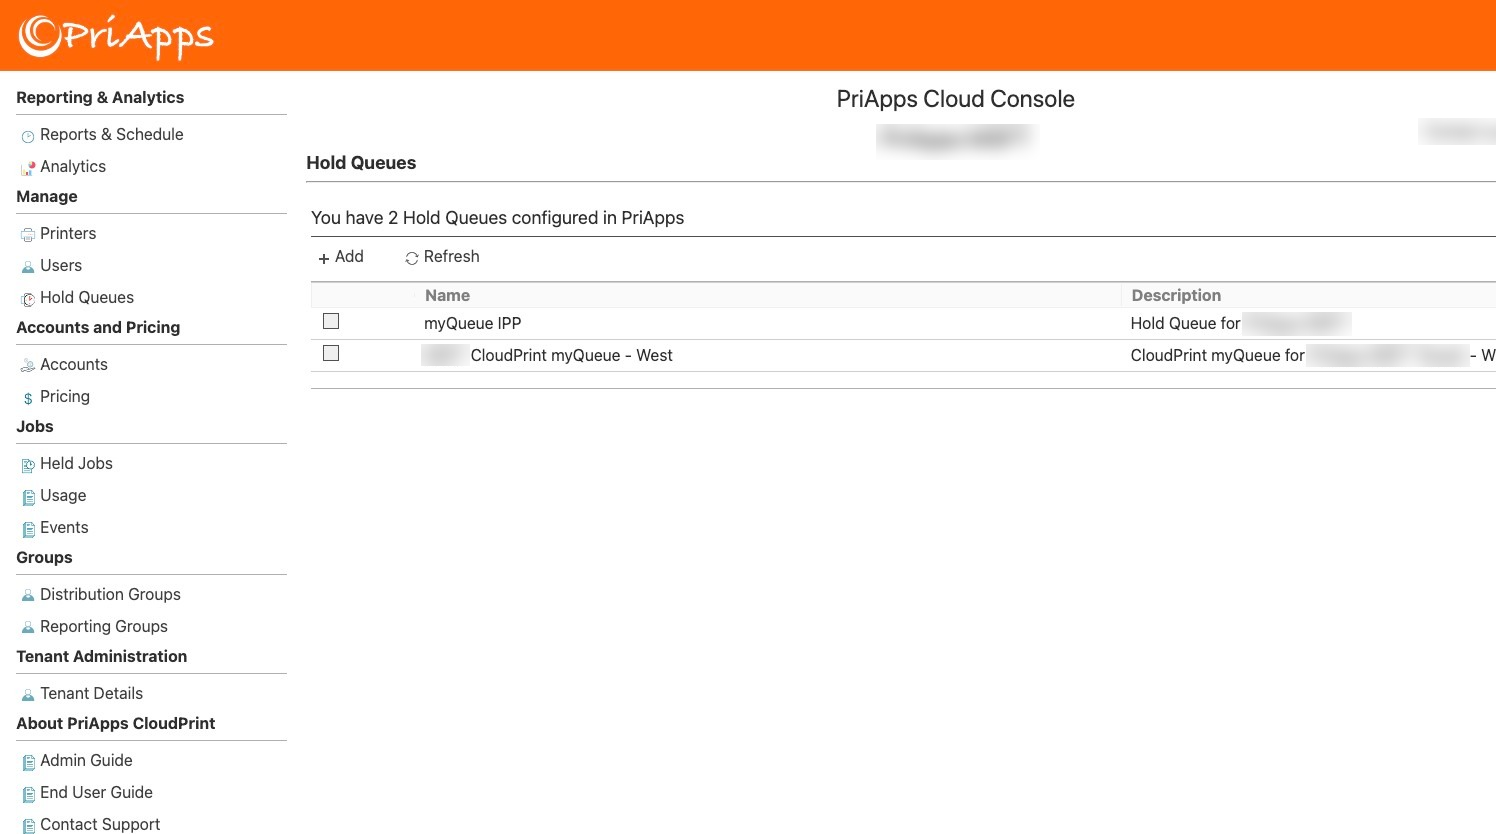
Check that it worked
The new myQueue appears in the list, and the number of hold queues configured at the top of the page goes up by one. It's ready to install on your users' computers. See Deploying myQueue manually.
Related articles
Deploying myQueue manually
Install a myQueue on a Windows computer by hand, using its IPP address from the PriApps CloudPrint Console, so the user can print to it.
Viewing held jobs
See the print jobs waiting for release in your hold queues, and open a job's details, such as its copies, color, paper and hold queue.
Adding MFPs, copiers and printers
Add an MFP, copier or printer to PriApps CloudPrint, and choose how its usage is charged and how users sign in at it.