
Deploying myQueue with Microsoft Intune
Download a myQueue's PowerShell installer script from the PriApps CloudPrint Console, ready to deploy to your users' Windows computers with Microsoft Intune.
To install a myQueue on many Windows computers at once, download its installer script from the PriApps CloudPrint Console and deploy it with Microsoft Intune. The installer is a PowerShell script that adds the myQueue as a printer. You can use it with another deployment tool in the same way.
Before you begin
- Sign in to the PriApps CloudPrint Console. See Signing in to the PriApps CloudPrint Console.
- Create the myQueue. See Creating hold queues.
Download the installer script
Show the setup instructions
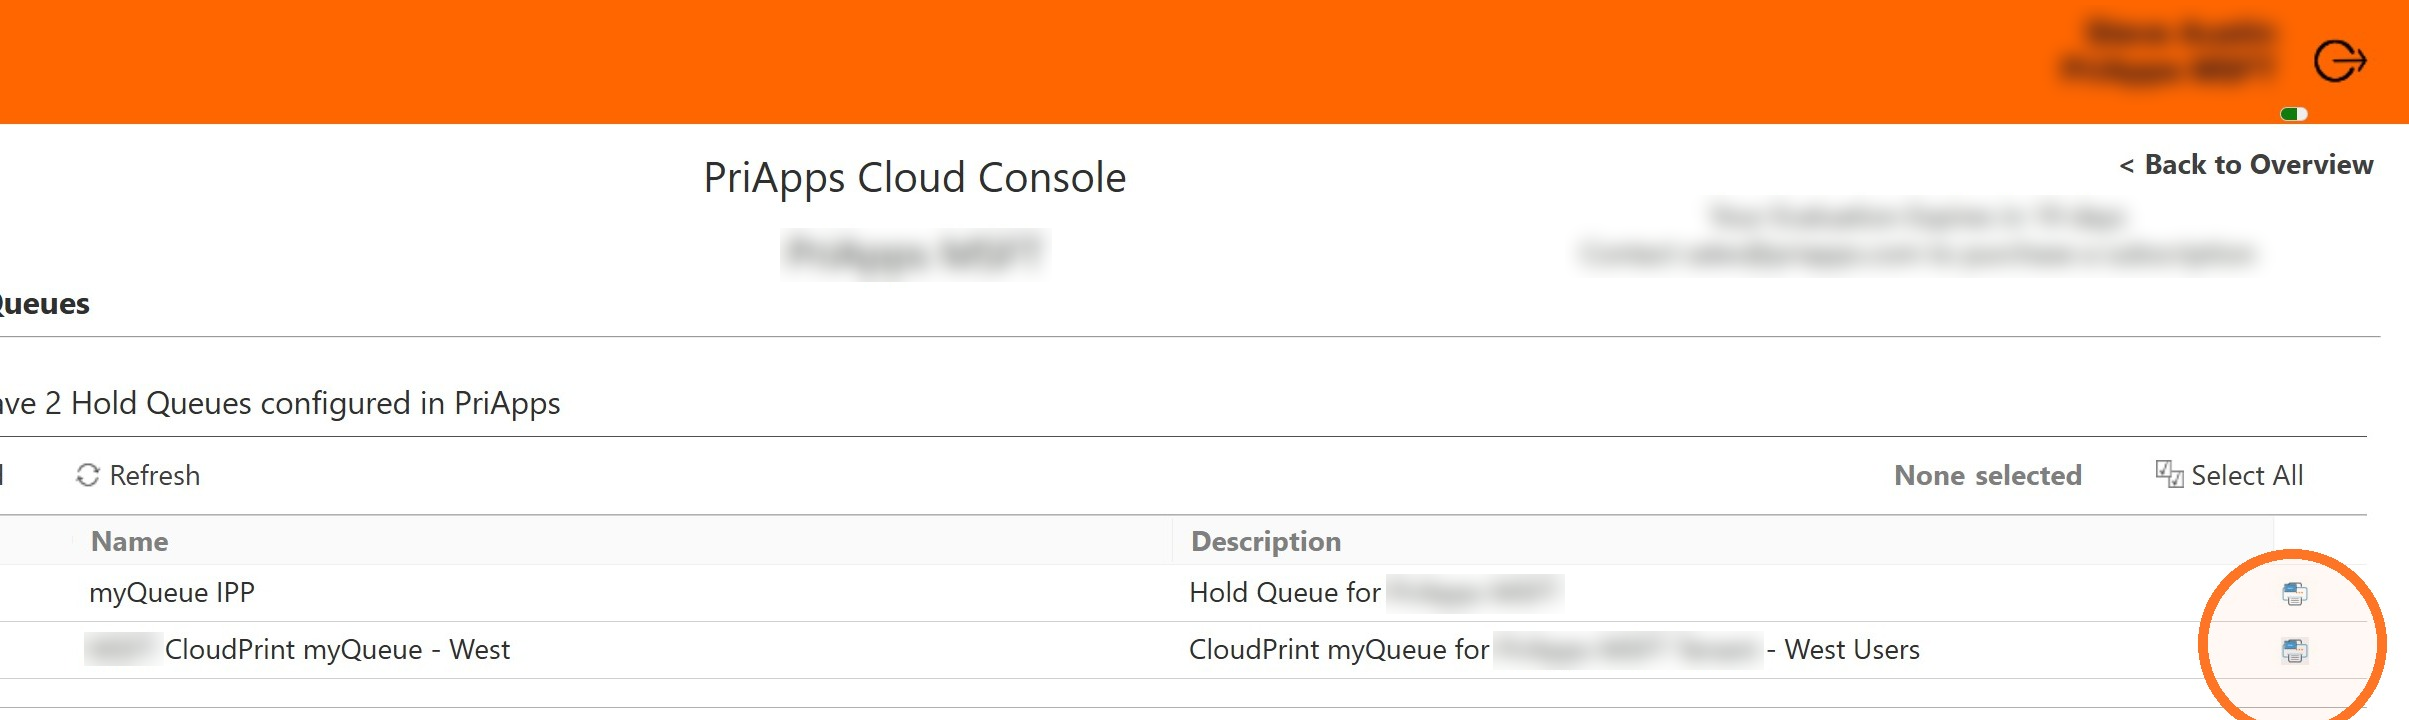
In the menu, under Manage, select Hold Queues. Next to the myQueue you want to deploy, select the Show IPP setup instructions icon.
Download the script
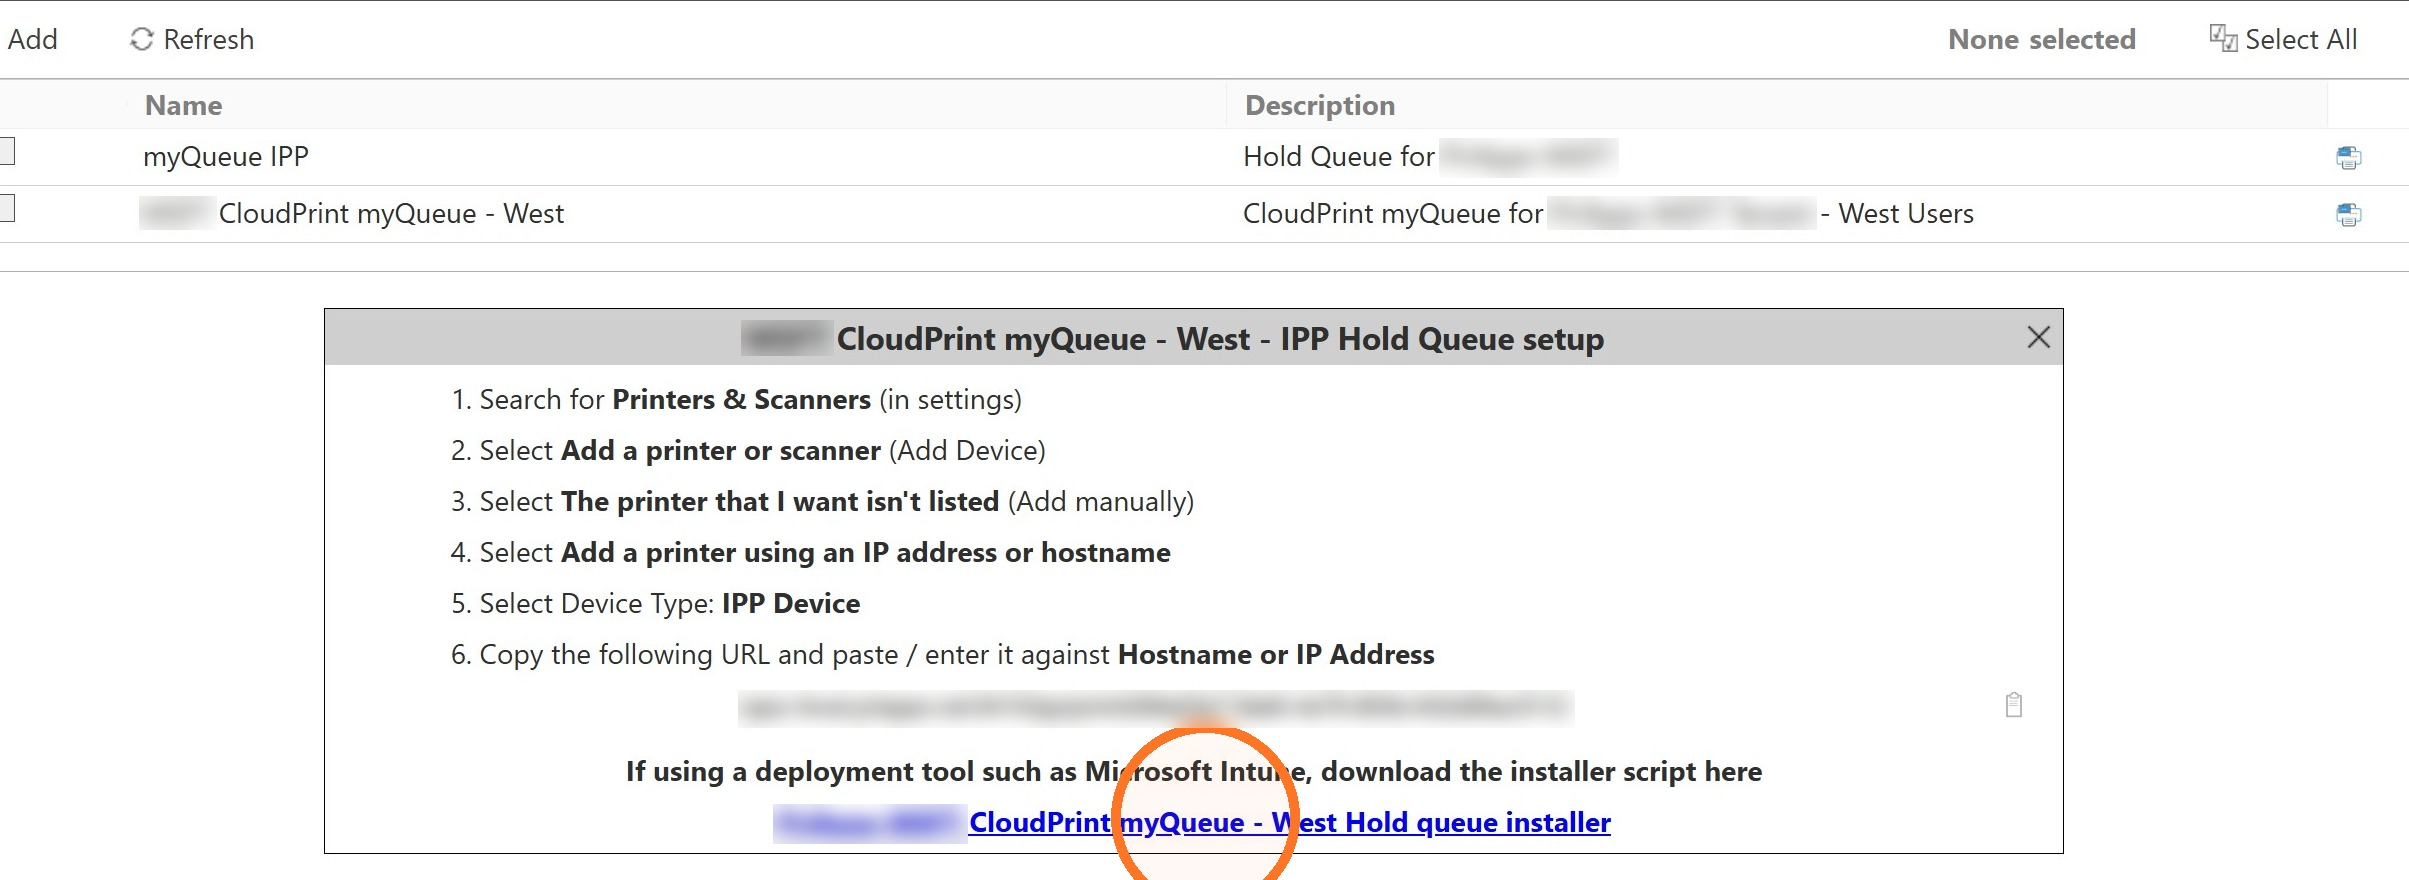
At the bottom of the setup box, under "If using a deployment tool such as Microsoft Intune, download the installer script here", select the myQueue's installer link.
Select OK
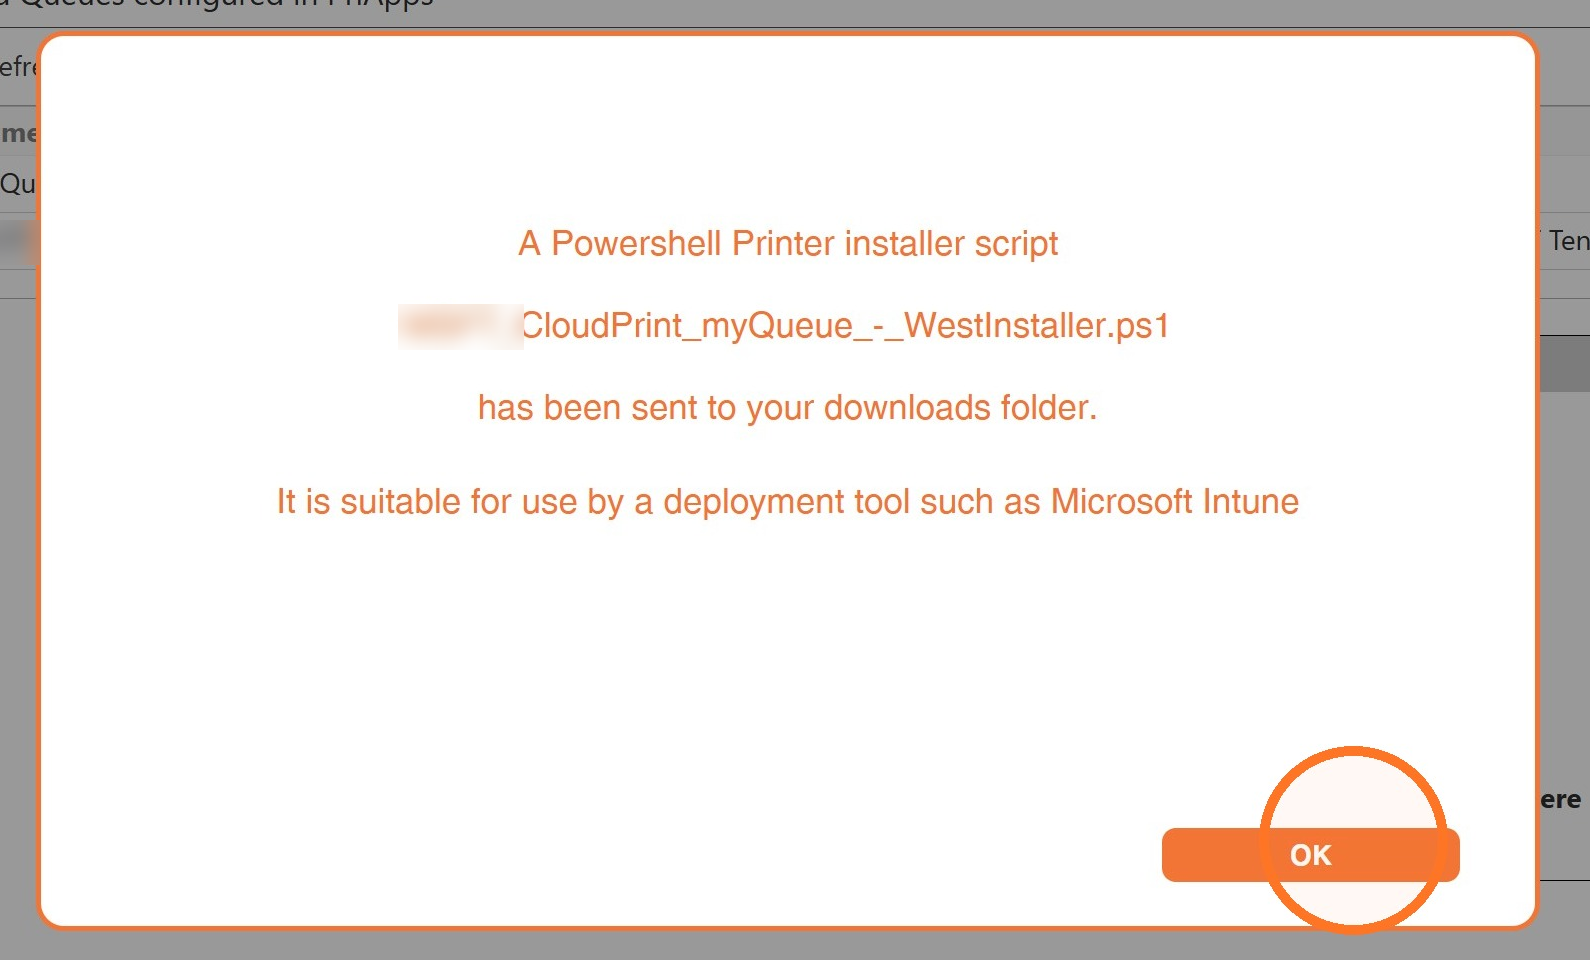
A message says the PowerShell installer script, a .ps1 file named after the myQueue, has been saved to your downloads folder. Select OK.
Deploy the script with Microsoft Intune
In the Microsoft Intune admin center, add the script as a PowerShell platform script for Windows, and assign it to the group of users who should print to this myQueue, for example the users at one site. For the steps, see Microsoft's article Use PowerShell scripts on Windows devices in Intune.
Check that it worked
Once Intune has run the script, the myQueue appears in Printers & scanners on each user's computer. A job printed to it waits in the hold queue until the user releases it, and you can see it in Held Jobs. See Viewing held jobs.
Related articles
Creating hold queues
Create myQueue hold queues in PriApps CloudPrint, so users' print jobs are held securely in your cloud storage until they release them at a printer.
Deploying myQueue manually
Install a myQueue on a Windows computer by hand, using its IPP address from the PriApps CloudPrint Console, so the user can print to it.
Viewing held jobs
See the print jobs waiting for release in your hold queues, and open a job's details, such as its copies, color, paper and hold queue.