MFP setup (SDK/J)
Required MFP settings for Ricoh ESA platforms 10.XX, 11.XX, and 12.XX before deploying the PriApps SDK/J application.
SP Mode settings
Entering SP Mode
Enter SP Mode on the MFP panel using the following key combination: RESET → 806182 → hold C button for a few seconds
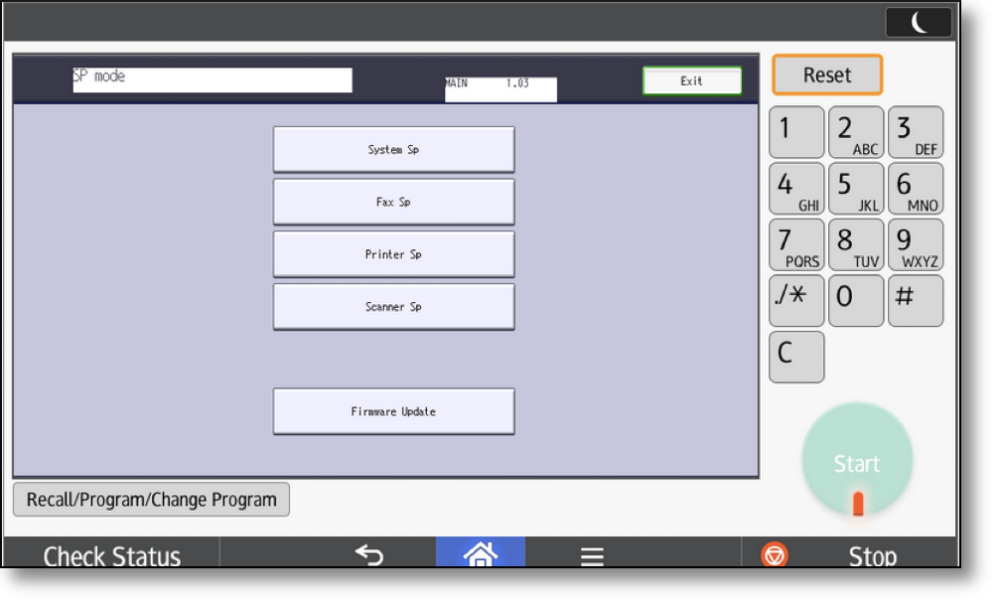
Configuring SP Mode
Touch the System SP button. Navigate to SP-5XXX Mode and scroll to SP 5113.
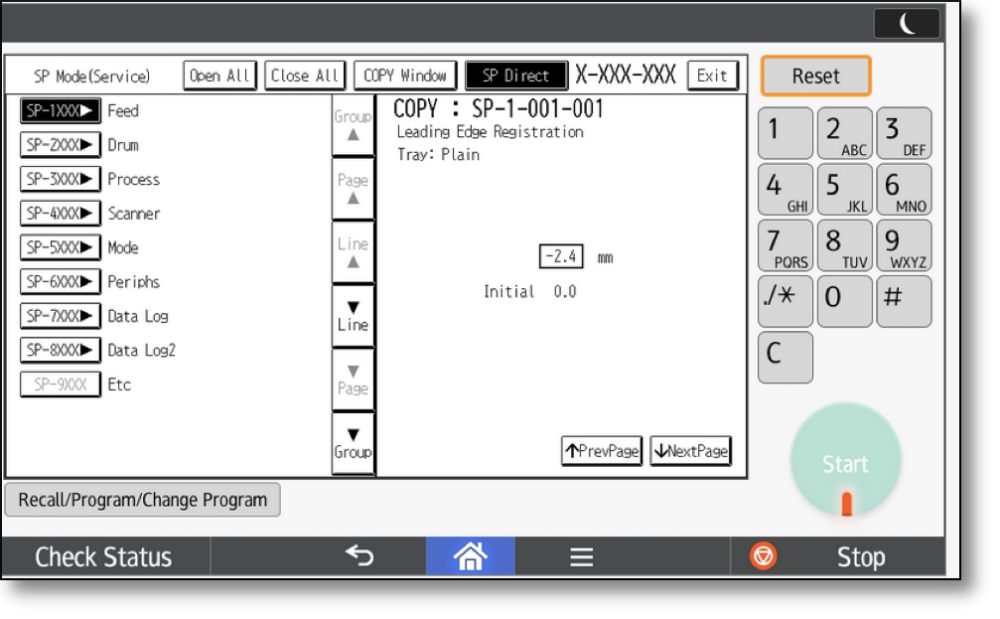
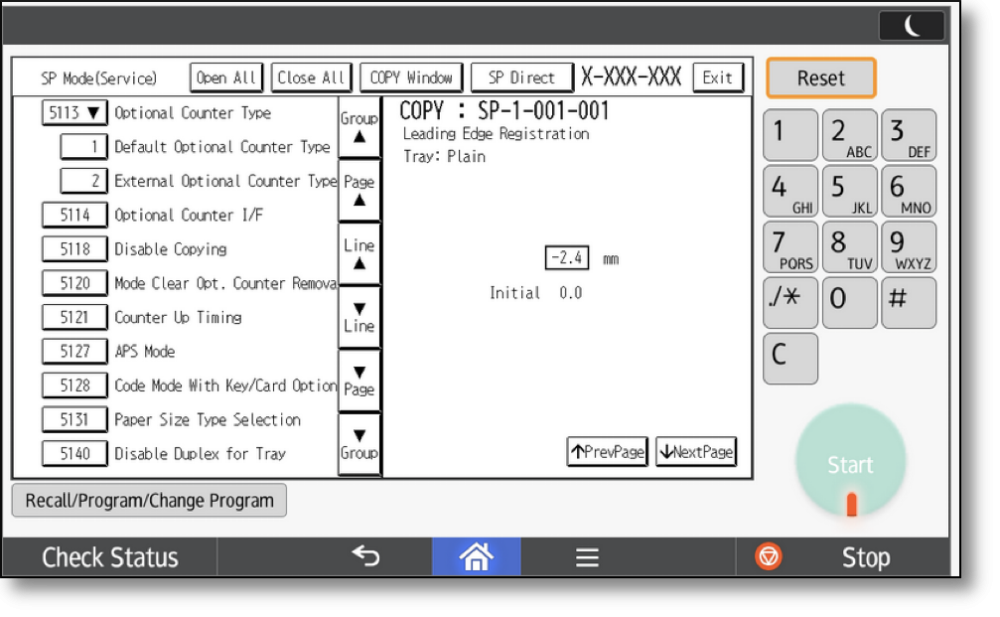
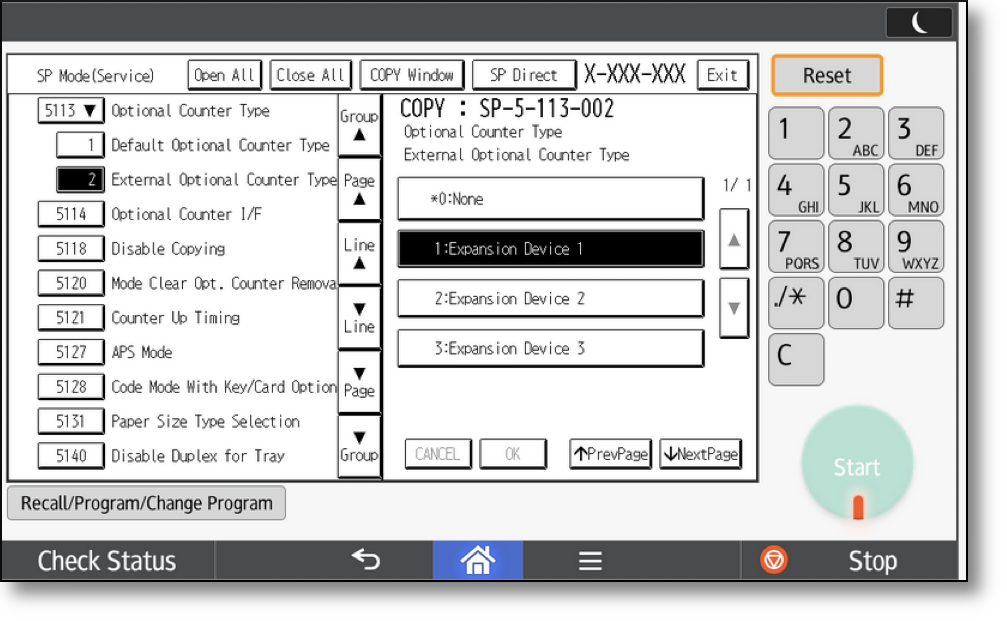
Select 2 under 5113 External Optional Counter Type. Then select 1:Expansion Device 1 and select OK to save the setting.
Select Exit to leave SP Mode.
User Tools settings
Press the User Tools hard key on the MFP panel.
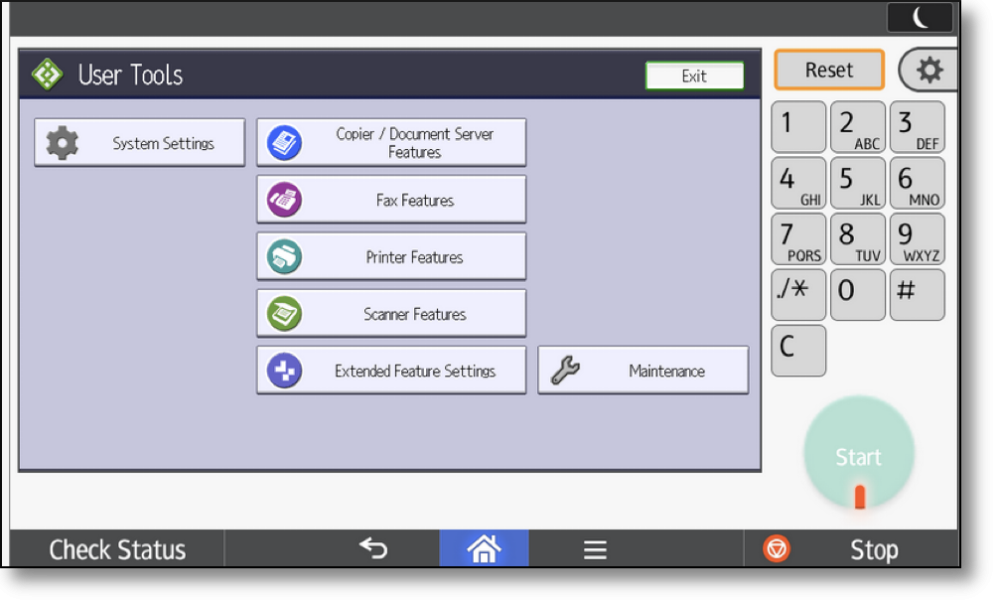
Select System Settings → Administrator Tools tab.
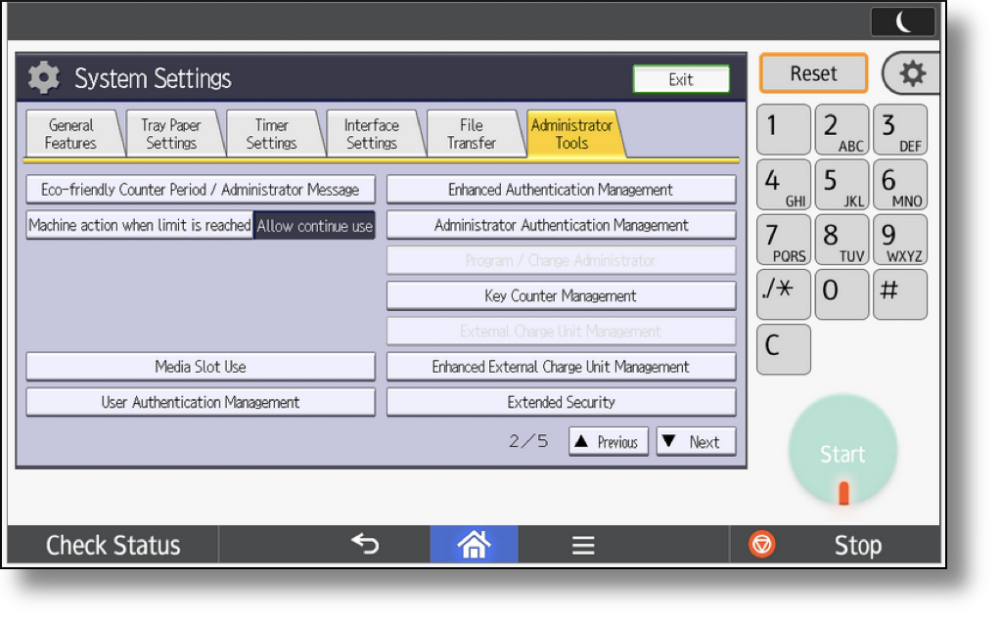
Scroll down and select Enhanced External Charge Unit Management. Select all the functions you wish PriApps to track, then touch OK. Select Exit to return.
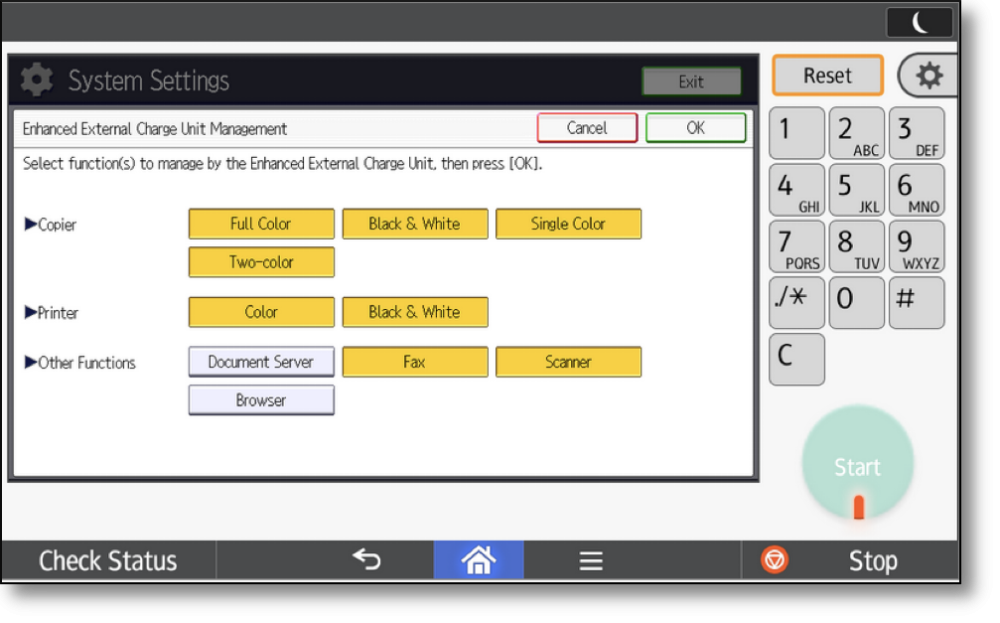
Once completed, the MFP is ready to have the PriApps SDK/J application installed and configured.