User management
Import users from Active Directory/LDAP or create them manually. Assign roles and organize users into groups.
Importing users from LDAP / Active Directory
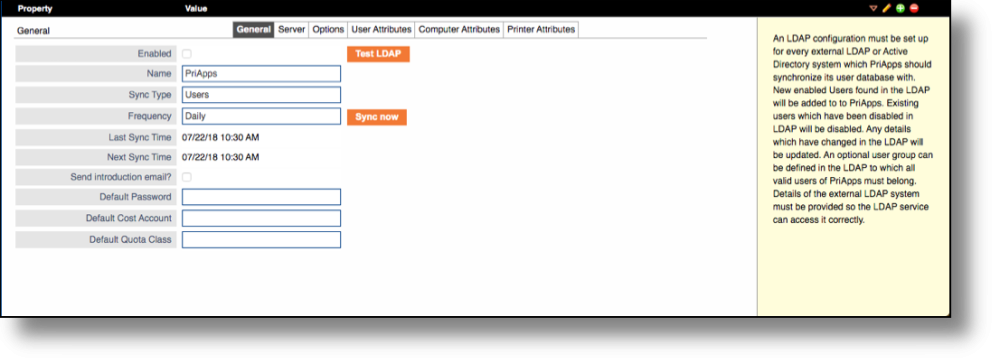
PriApps integrates with your LDAP or Active Directory service to import and synchronize users automatically. Navigate to the LDAP/AD integration settings and configure the connection using the General, Server, Options, User Attributes, Computer Attributes, and Printer Attributes tabs.
Once configured, click Test LDAP to verify the connection. If successful, click Import to import your users.
First ensure the LDAP services are started. Click on Manage Server in the left side menu bar and ensure that both LDAP Update Service and LDAP Authentication Service are both enabled and started.
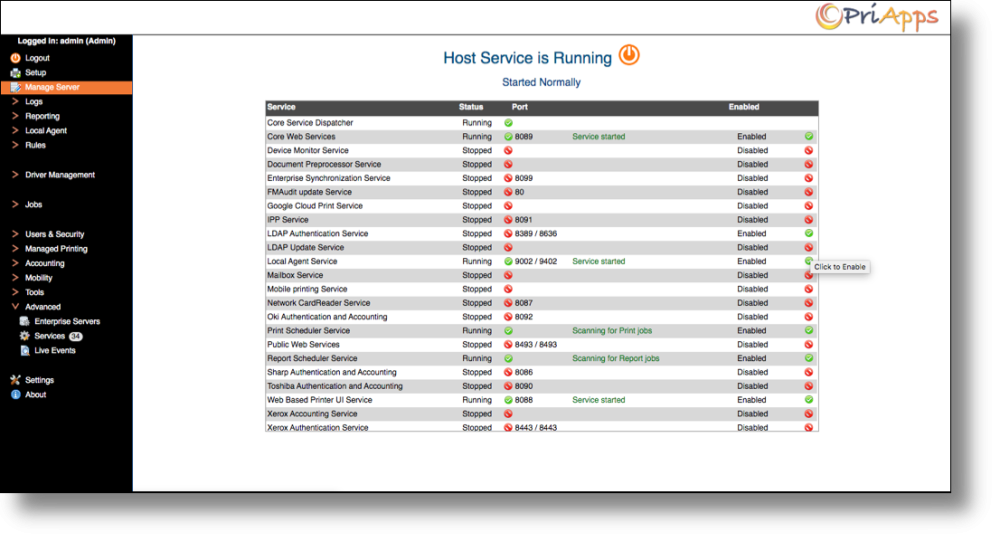
See the LDAP / Active Directory section for full configuration details.
Manually creating users
To add a user manually, navigate to Users & Security → Users and click the Add (+) button. Complete the General, Options, Accounting, and Advanced tabs as appropriate.

Roles & permissions
Roles define what MFP services a user can access. Navigate to Users & Security to create and manage roles. Each role can permit or restrict print, copy, scan, fax, and color access independently.
Creating groups
Users can be organized into groups for bulk management of quotas, roles, and cost recovery rules. Navigate to Users & Security → Groups to create and manage groups.